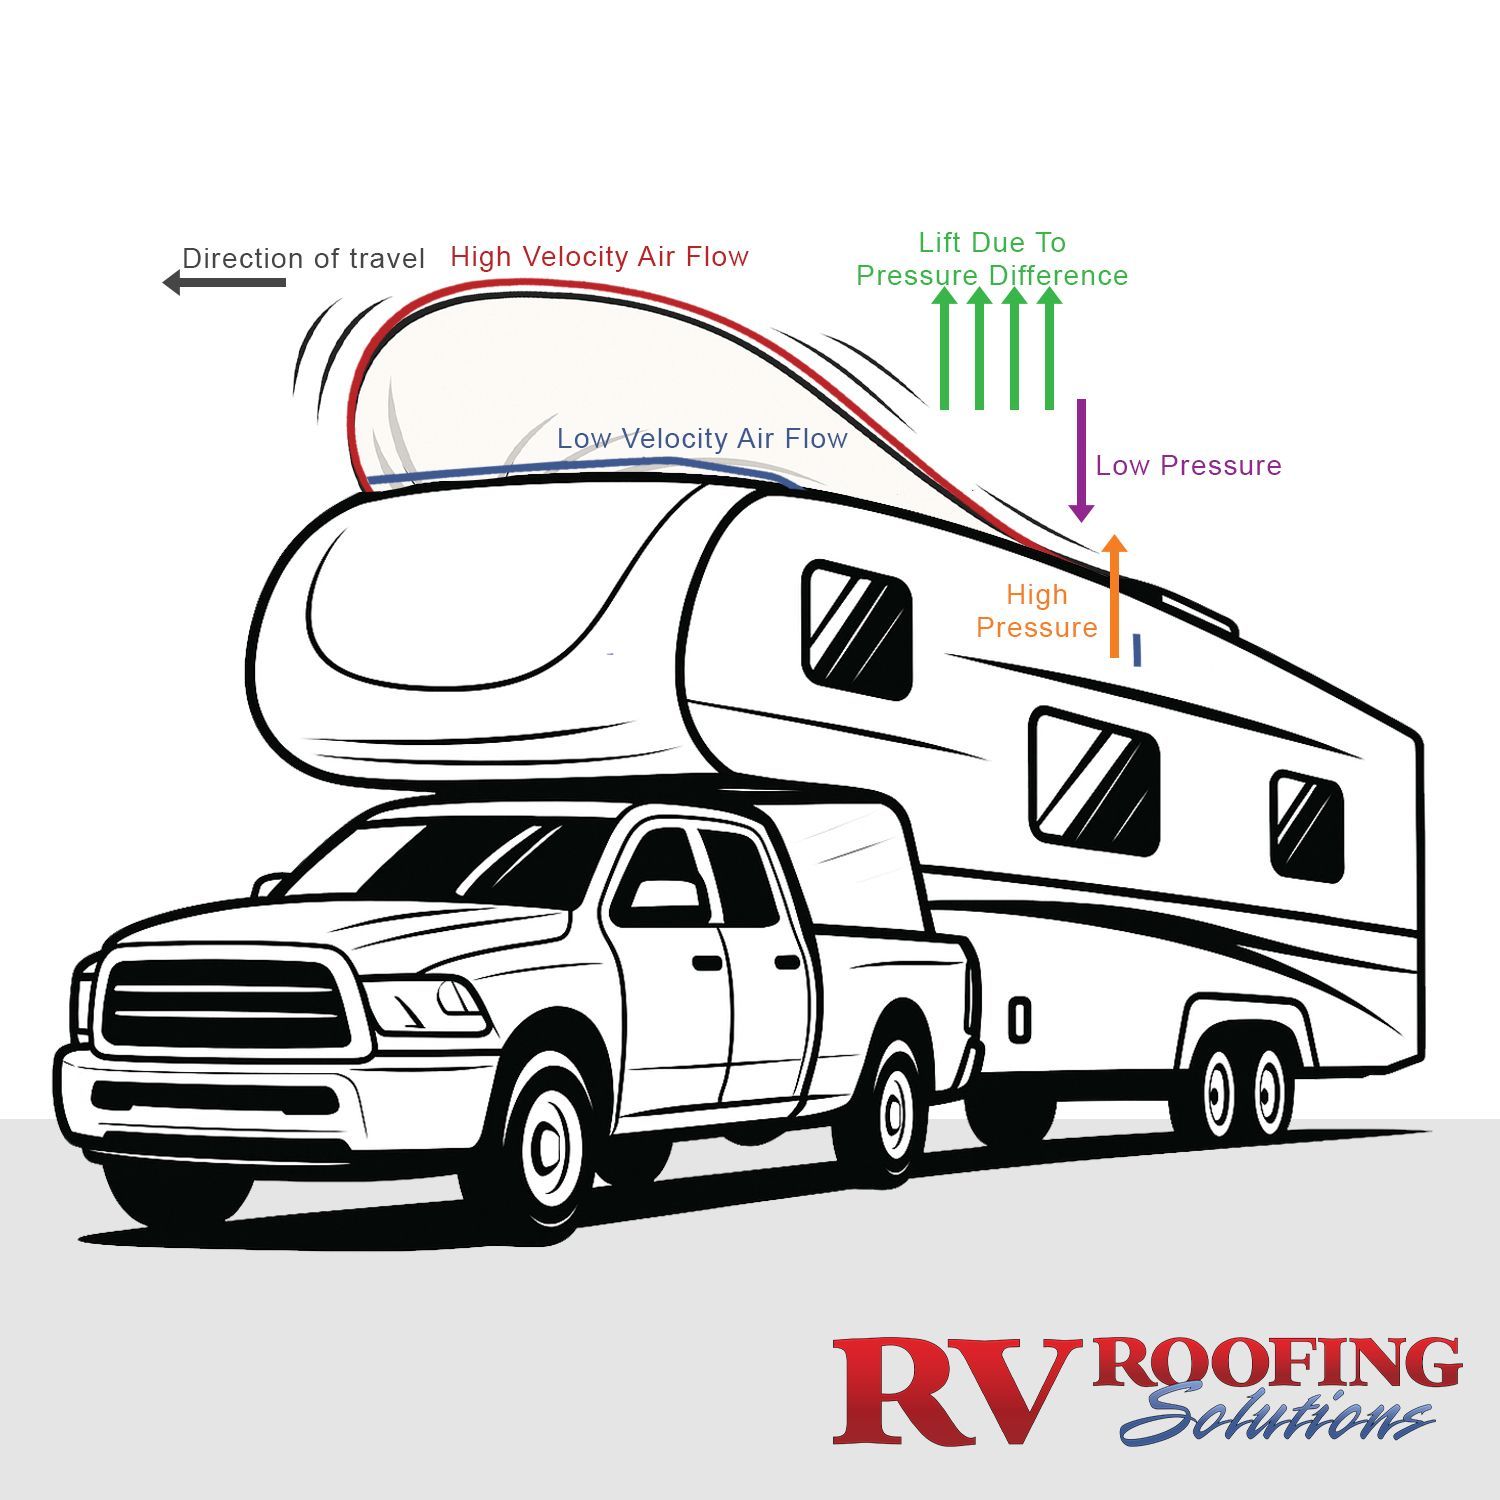
RV Roof Ballooning: Why Your Membrane Lifts at Highway Speeds (And We Will Show You How to Fix It)
"We were headed east, chasing the sunrise and the next stop on our journey, when the honking started.
Not the impatient kind. Not the 'You cut me off' kind. This was the urgent, get-your-attention kind. A convoy of truckers flashing lights and laying on their horns as they passed us on the interstate. One rolled down his window and pointed up.
We pulled over fast. And there it was—our roof membrane, puffed up like a parachute mid-deployment. A full-on balloon flapping in the wind, threatening to tear loose with every gust."
Why Factory Installations Set You Up for Failure
Here's an uncomfortable truth: many factories prioritize production speed and cost savings over long-term performance. Instead of full adhesion, they use shortcuts—gluing roofs in sections, seam-sealing edges rather than reinforcing them, and leaving vulnerable points around the front cap.
As your RV ages, these compromises compound:
- Adhesives degrade under heat and UV exposure
- Moldings shift or loosen
- Weak seams separate
- Small pinholes develop into major problems
What saved the manufacturer time and money becomes your expensive headache on the road.
The Real Cost of "Just Gluing It Back Down"
When ballooning happens, many people's first instinct is to simply re-glue the membrane. But this approach is like putting a band-aid on a broken bone. Here's why it often backfires:
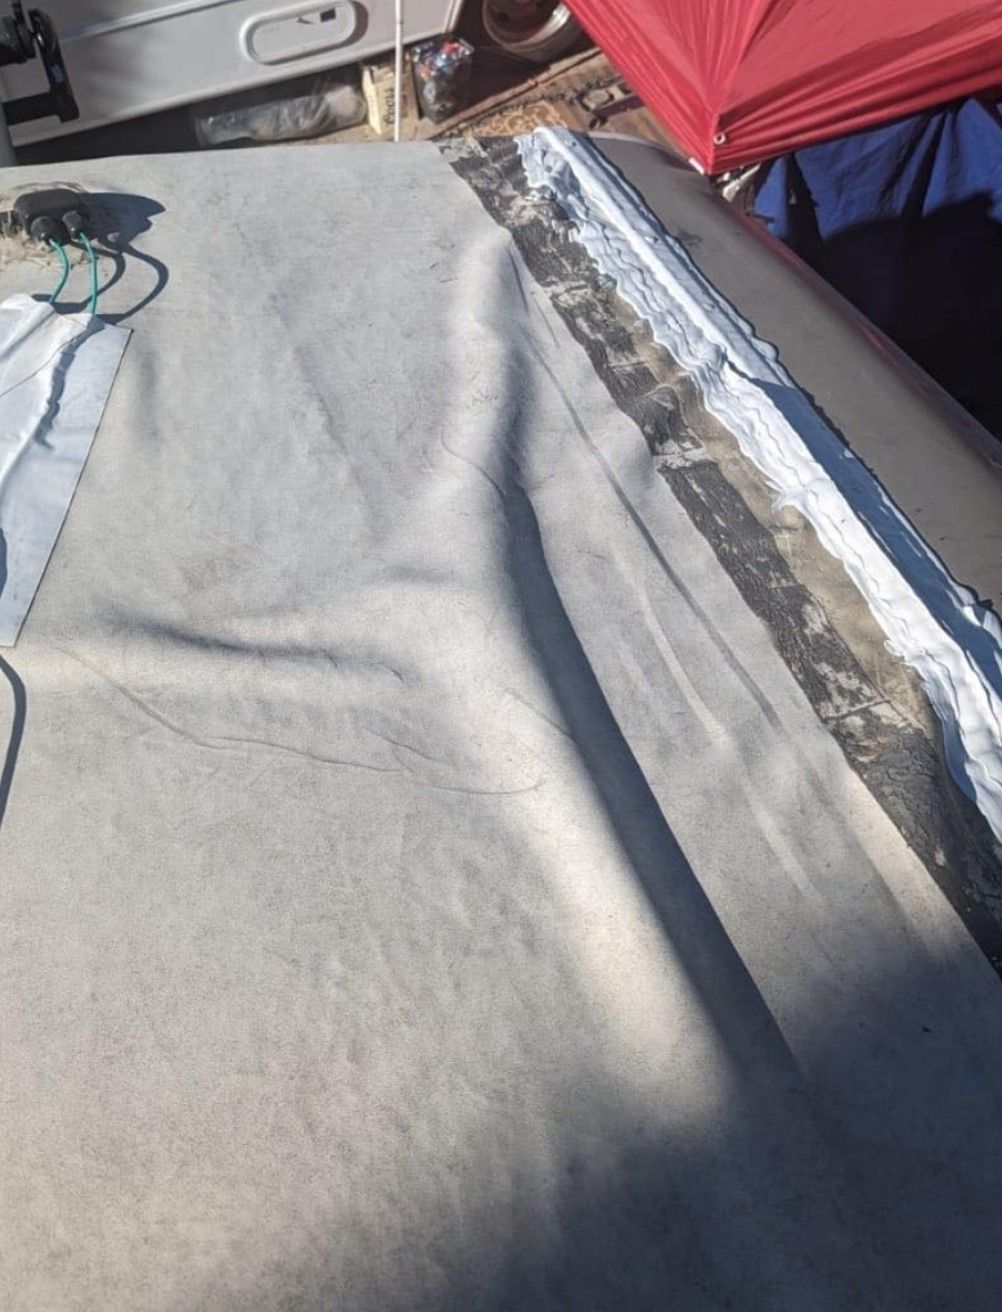
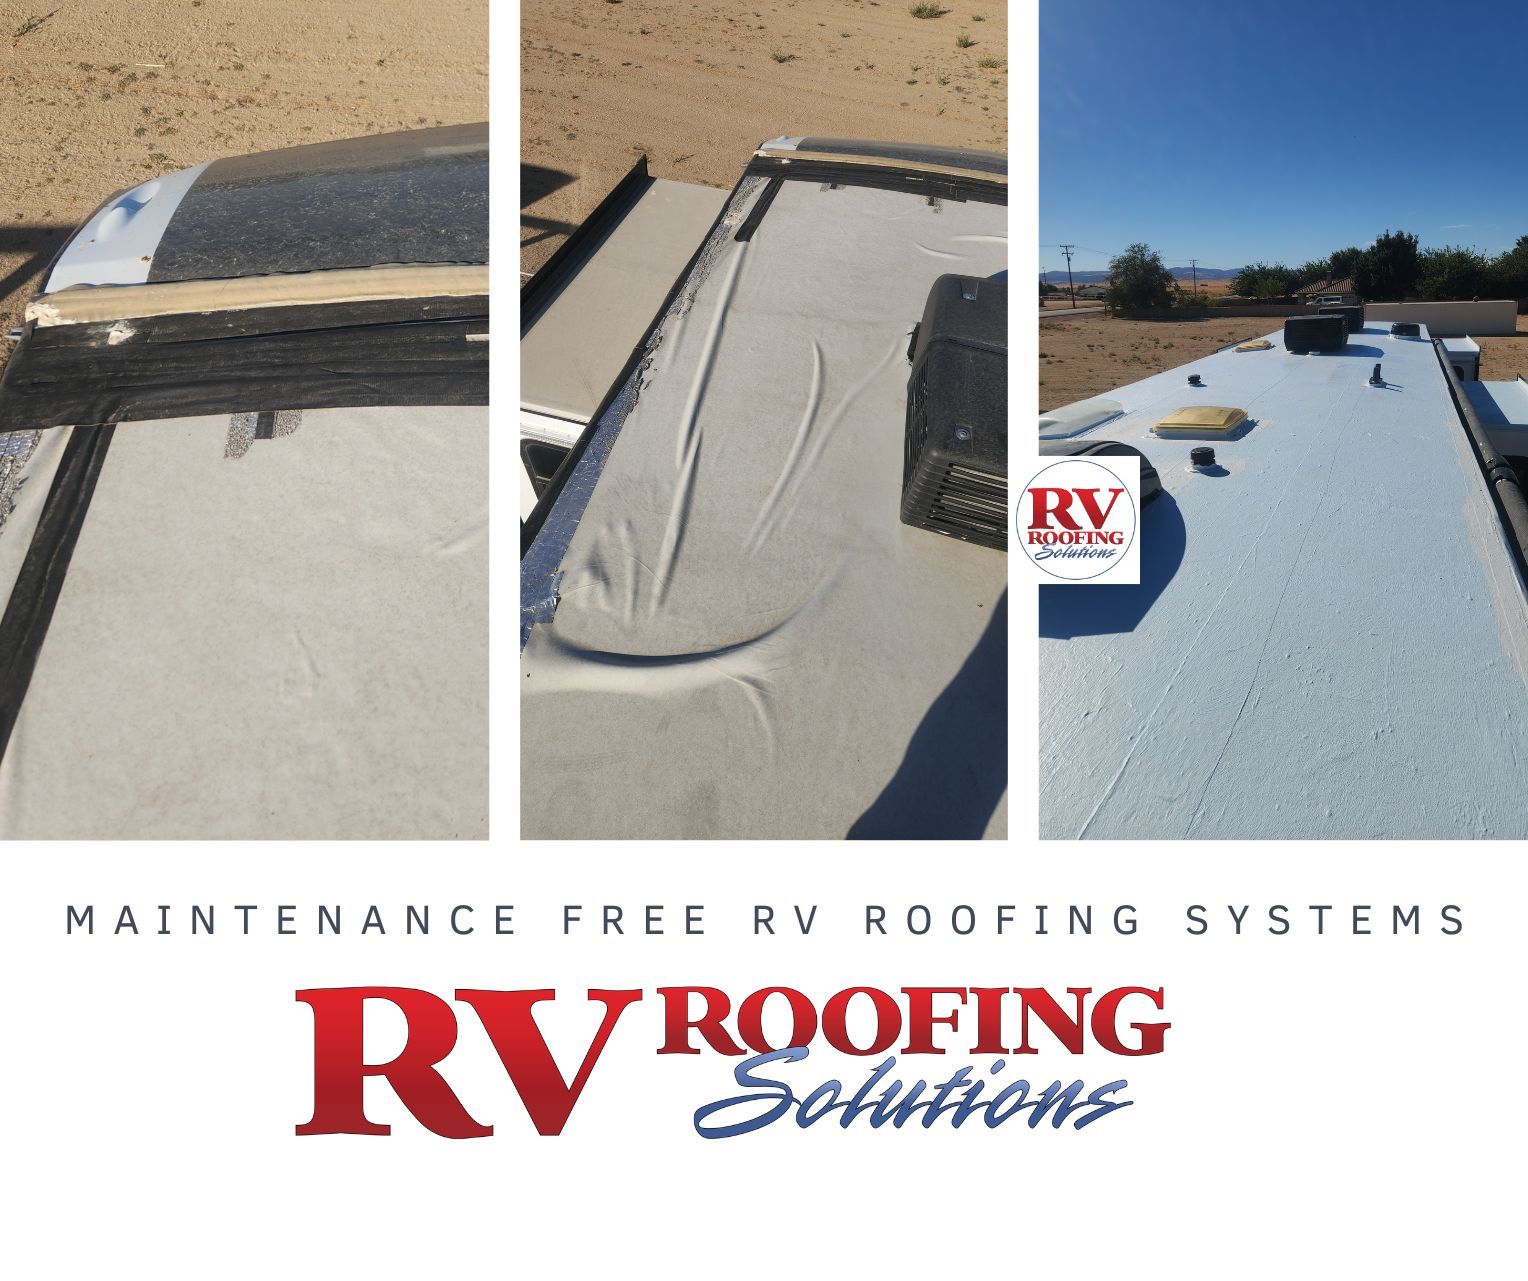
Hidden damage lurks beneath. Ballooning means air and moisture have already infiltrated your RV’s roof. Gluing over this traps water, leading to mold, rot, and structural damage you can't see.
Stretched membranes don't recover. Think about the last time you blew up a birthday balloon—how the rubber became so thin you could see through it. Your roof’s membrane does the same thing. Once it’s ballooned, it's thinner and compromised in those areas. When you just glue it back down, you're essentially reattaching damaged material.
Wrong adhesives make things worse. Not all glues are created equal. And not all adhesives are made for your RV, let alone your RV’s roof. Cheap adhesives break down under UV light and temperature changes, creating bigger problems later.
Prevention: Your Best Defense
Regular maintenance can help prevent ballooning before it starts:
- Inspect regularly: Look for gaps, lifting, or discoloration around the front cap and edges.
- Reinforce vulnerable areas: Consider double front cap molding with self-leveling sealant.
- Plan for complete maintenance: Replace all sealant every 12-18 months if your RV is regularly outdoors, every 18-24 months if it is stored indoors.
Over time, sealant dries out, cracks, and pulls away, particularly around roof penetrations, like your vents or air conditioners, and edges. When addressing the compromised sealant, a simple patch or recovering old sealant won’t do. Begin by completely removing the old sealant, then thoroughly clean and dry the surface before placing the new sealant.
Consider keeping an RV roof first aid kit on hand for issues on the road. A kit like this can help you care for your roof until you can get to a professional RV roofing solution. Learn what to keep in your RV roof first aid kit here.
The Professional Solution: Engineered Prevention
At RV Roofing Solutions, we've spent over 20 years developing a system that doesn't just fix ballooning—it prevents it entirely. Our approach addresses the root causes:
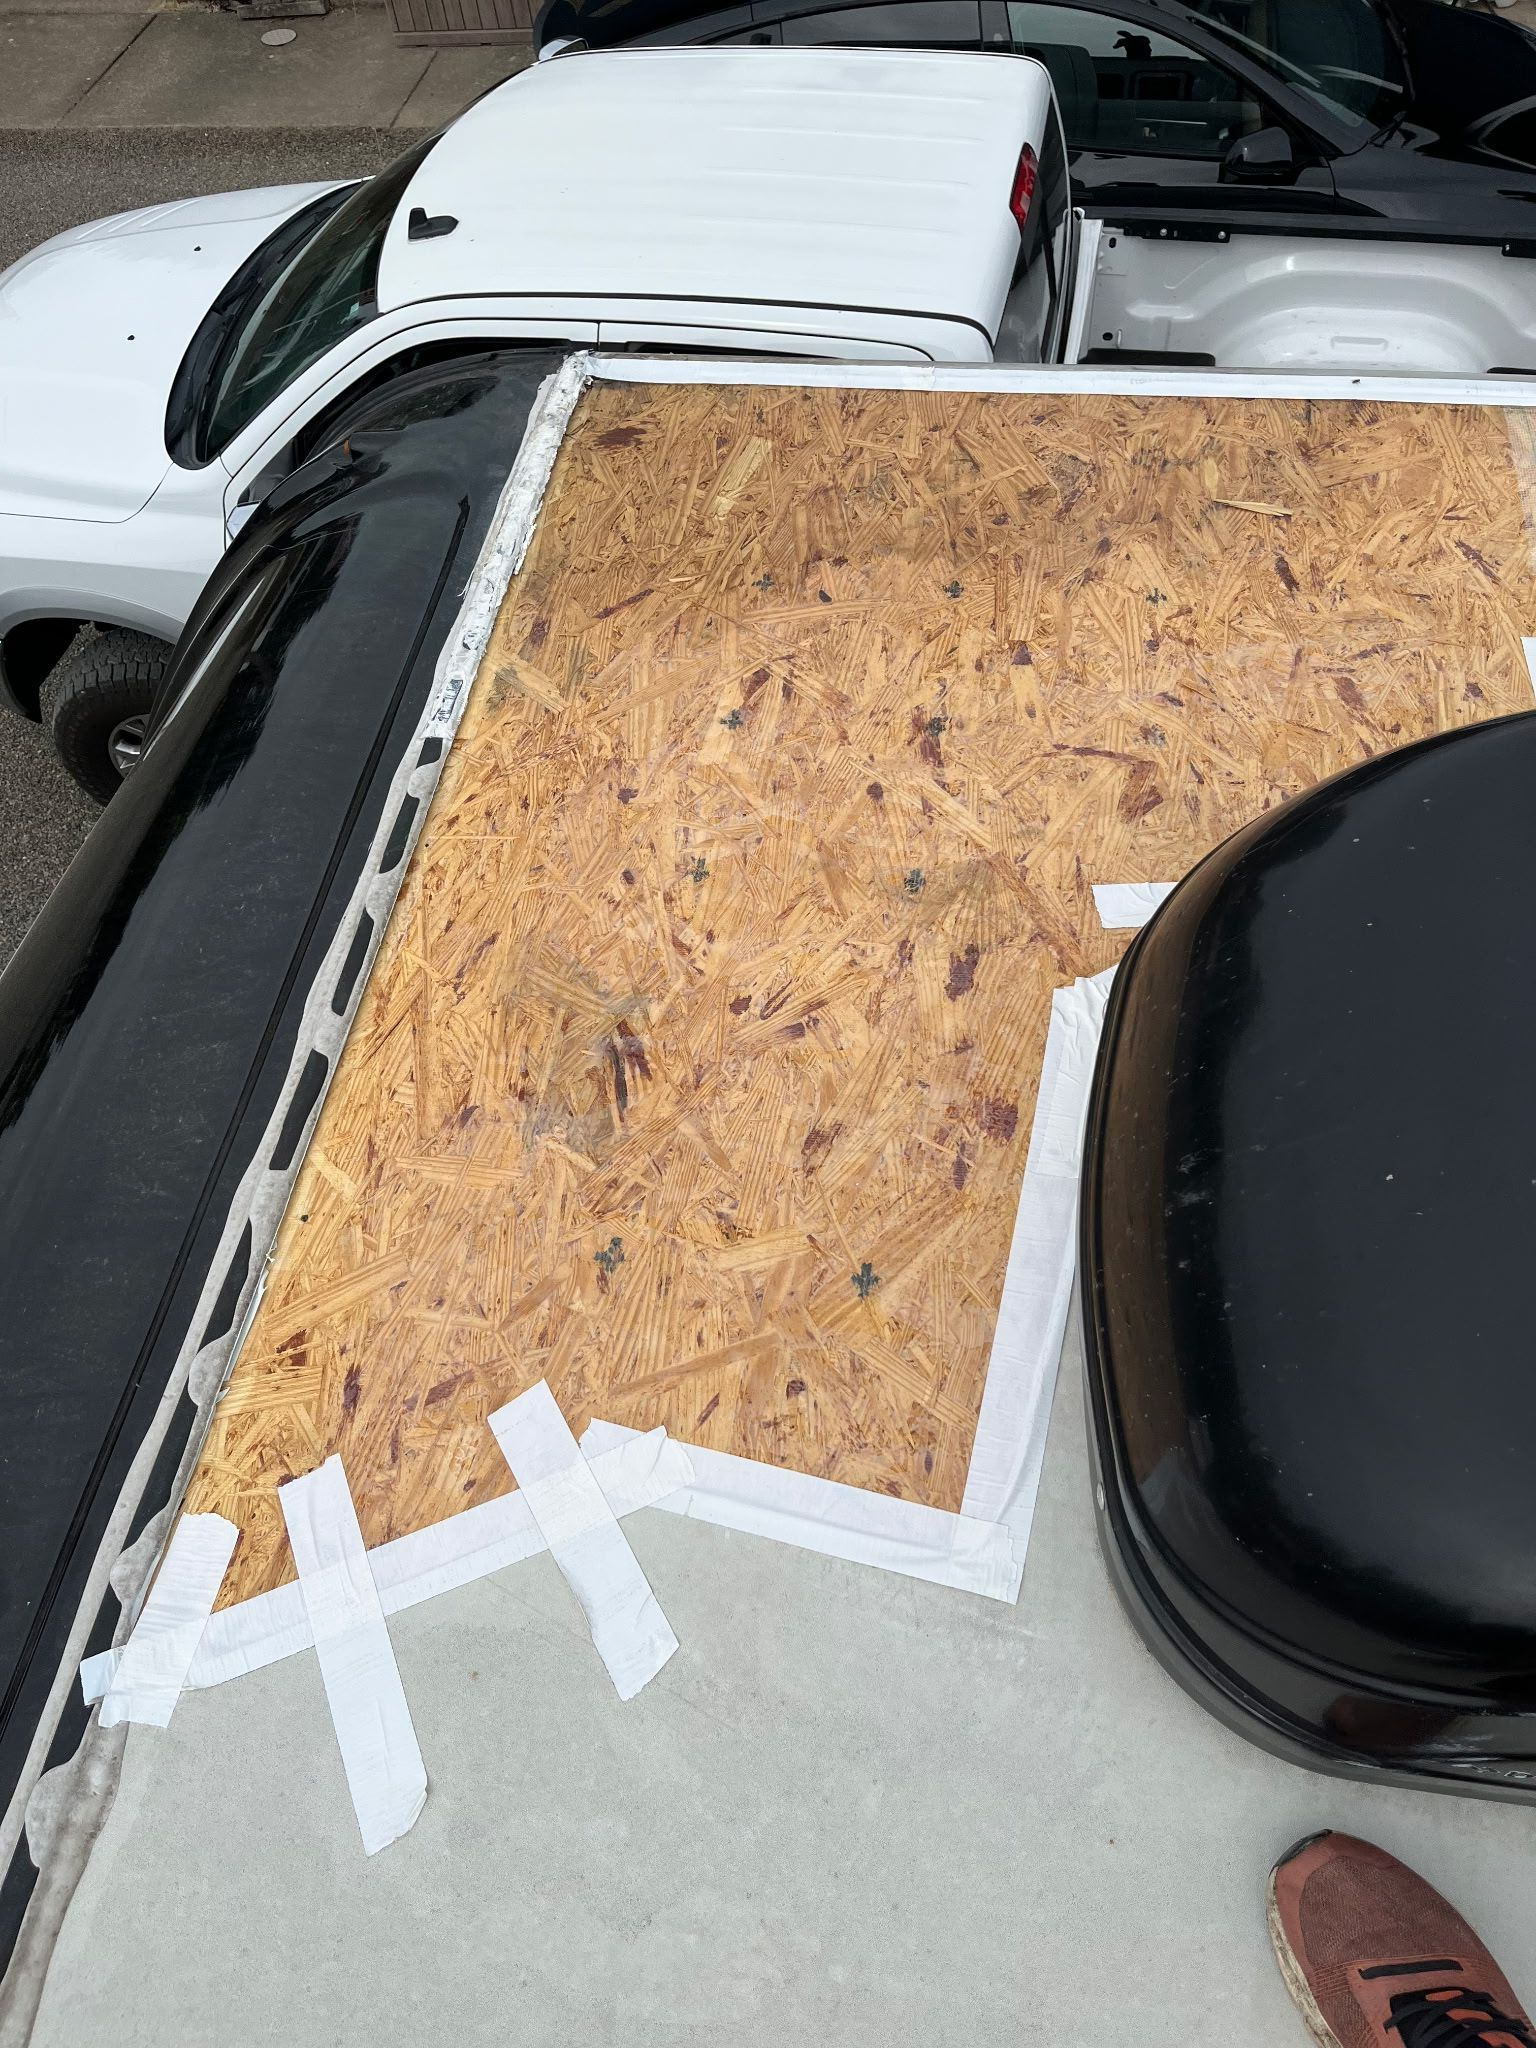
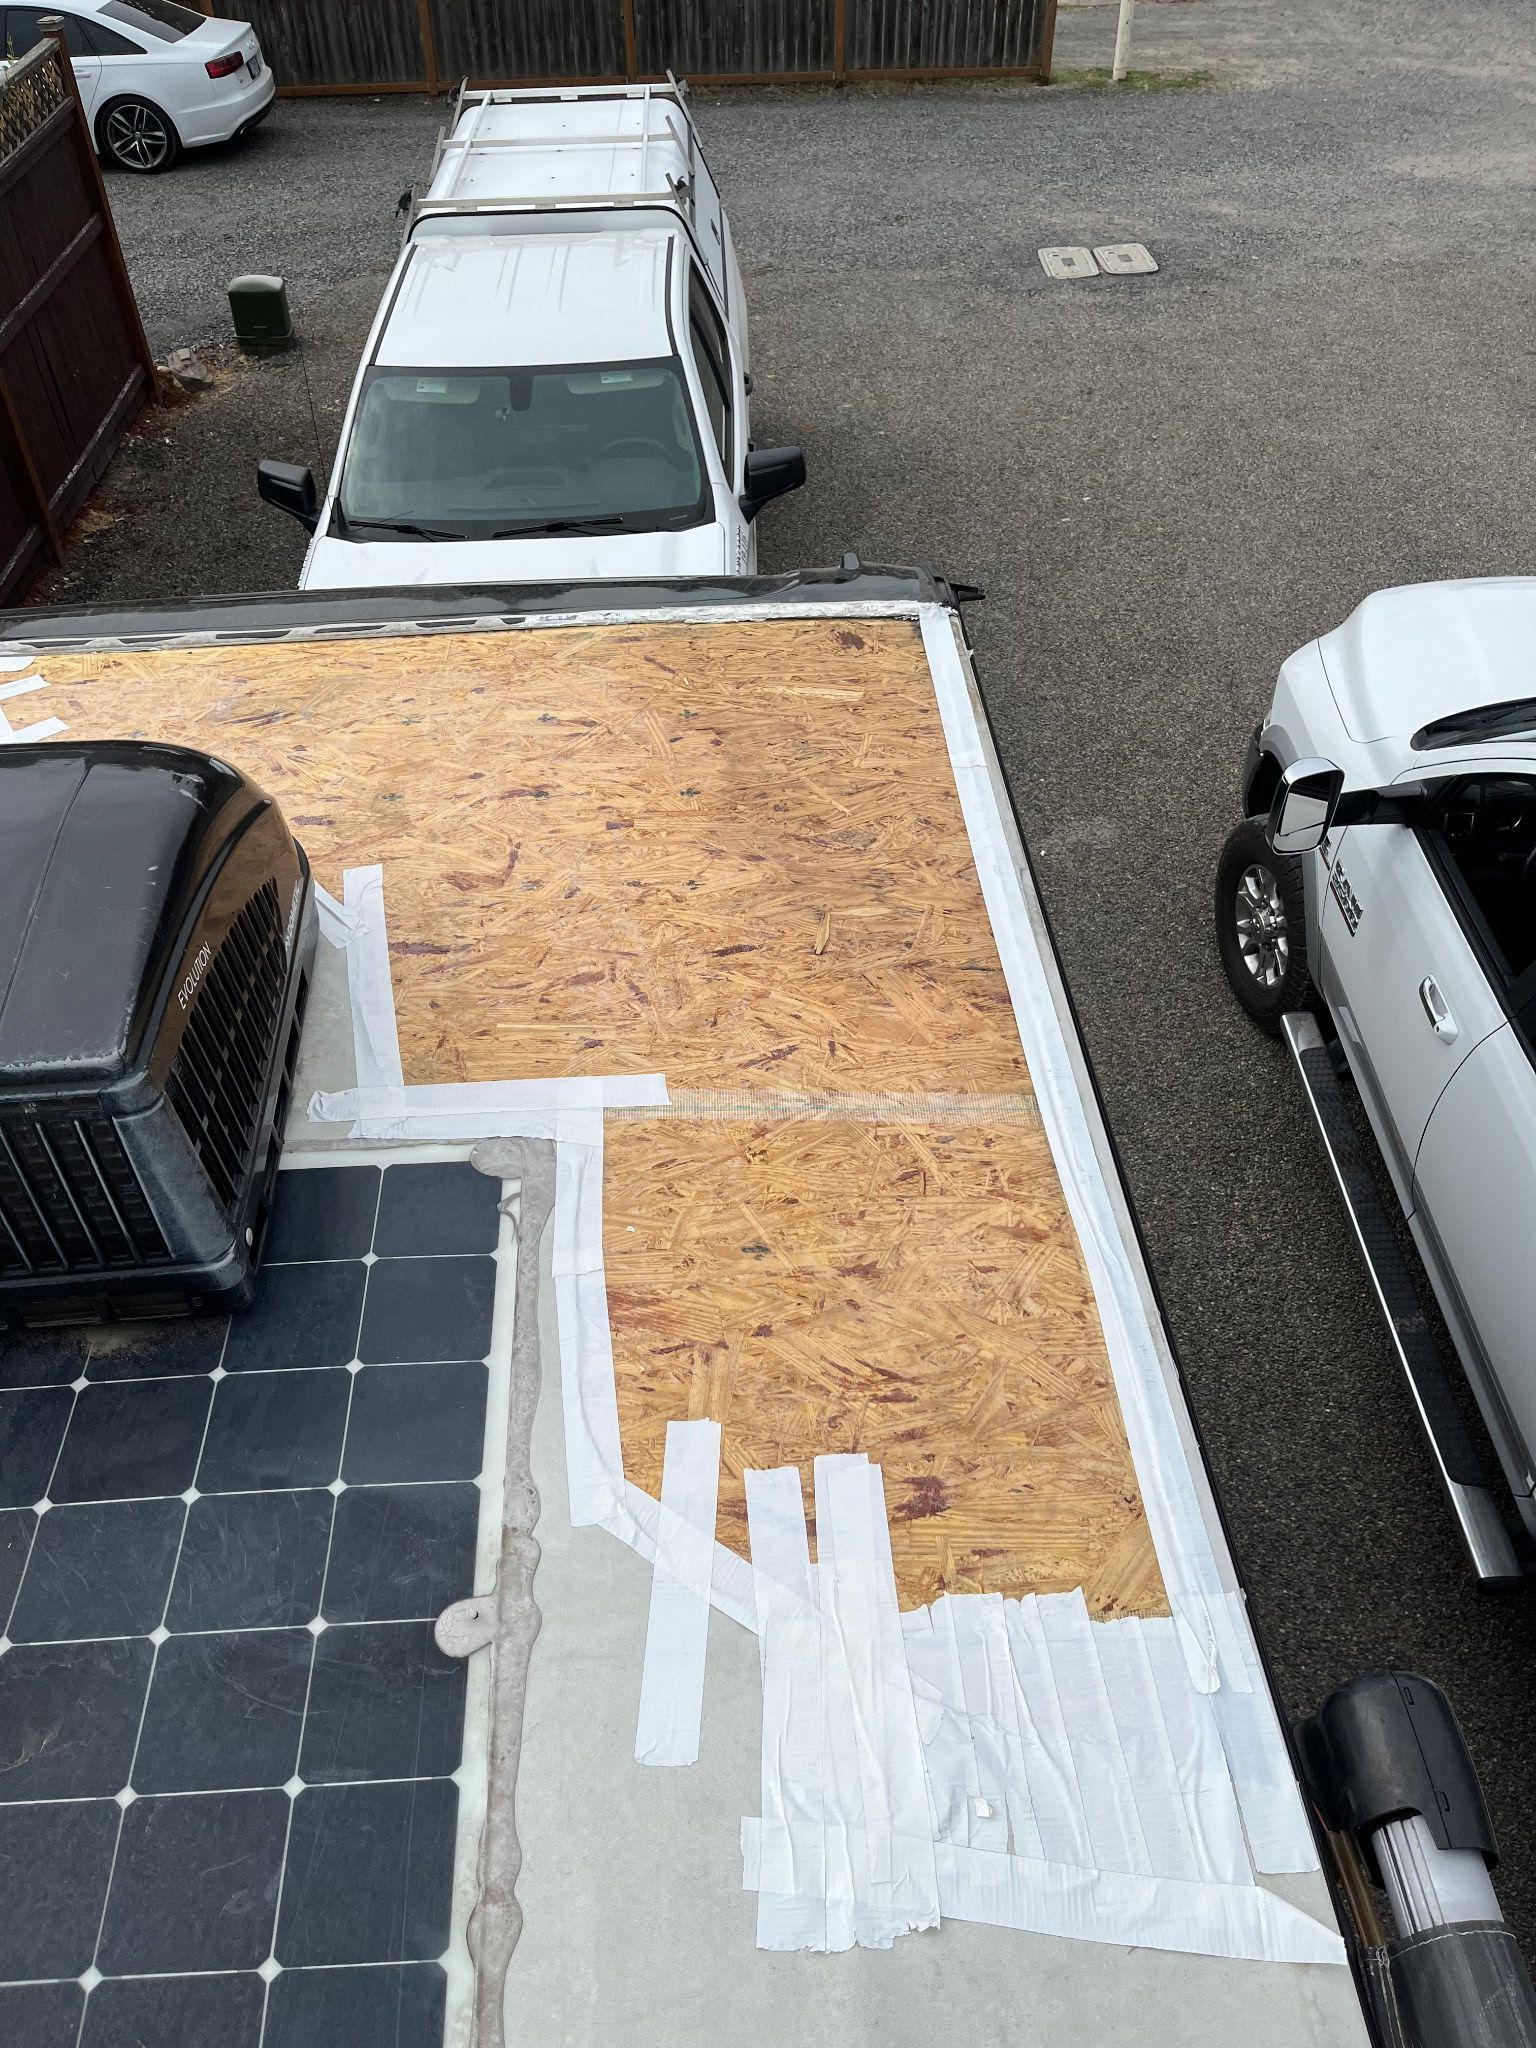
Seamless, monolithic membrane: No seams mean no weak points where air can infiltrate. Our custom acrylic system is wind-tight, waterproof, and breathable.
Full adhesion across the entire roof deck: Unlike factory installations, we bond the membrane completely and evenly, eliminating air pockets and ensuring the roof stays flat at any speed.
Reinforced termination points: We strengthen both front and rear caps with strategic edge treatments, often including double molding and high-quality lap sealant to block reverse airflow.
Custom fabrication: Every installation is tailored to your specific rig's structure and aerodynamics. No shortcuts. No generic solutions.
We offer different installation options based on your roof's condition:
- Standard install: Works with existing substrate in good condition
- Direct-to-deck: Complete rebuild when the original substrate is compromised
- Partial direct-to-deck: Strategic reinforcement that preserves sound sections while addressing problem areas
What to Do If Ballooning Happens to You
If you discover your roof ballooning:
- Document everything: Take extensive photos of the damage
- Assess carefully: Lift and inspect for underlying damage, ensuring not to pull on the membrane
- Temporary stabilization: Use EternaBond® tape as needed to prevent further damage, but remember, this is just a band-aid
- Contact professionals: Call both your insurance company and a reputable RV roofing specialist
5. Don't delay: The longer you wait, the more extensive and expensive the damage becomes
How Much Does RV Roof Membrane Repair Cost? Prevention vs. Emergency Fixes
The cost of RV roof repair varies dramatically depending on when you address the problem:
Preventive maintenance: Regular sealant replacement every 12-18 months costs $200-500 if you are doing it yourself but can prevent thousands in damage. Paying a certified RV tech can and does range from $900-$2000 and this has to be done every 18 months.
Emergency ballooning repair: Temporary fixes with EternaBond tape begins at $50-100 and goes up from there depending on how much of your deck you tape. Follow-up professional repair costs thousands of dollars, depending on the underlying damage.
Complete roof replacement: When ballooning leads to water damage and rot, full replacement can cost upwards of $10,000-18,000.
Professional prevention system: A custom RV Roofing Solutions system typically costs less than emergency repairs while providing long-term protection.
The key take-away? Early intervention saves both money and travel disruption. Many of our clients (about 60%) install our system preventively rather than waiting for problems to develop. And if you ask them, they’ll tell you it was an investment well worth it.
Whether you're full-timing, roadschooling, or weekend wandering, roof failure shouldn't be part of your adventure story. Modern adhesive technology has improved significantly over the past 25 years, with water-based, low-VOC formulas that are safer and more effective. However, temporary DIY fixes remain just that—temporary. The best way to know your RV roof is protected is to get it treated by the professionals. And what’s more convenient than having the professionals come to you?
We’ll send our RV Roofing Solutions technicians to you, anywhere in the lower 48 United States, to install your specially engineered roofing system. Because what’s the use of a new, improved RV roof if getting one takes you off the road?
Ready to Ground Your Roof for Good?
The earlier you address potential problems, the more options you have and the less it costs. Don't wait for the next convoy of truckers to wave you down or the next gust of wind to test your roof's limits.
There's no one-size-fits-all solution to RV roof issues, but there is a way to stop living in fear of the next balloon sighting. As a veteran-owned, family-run business, we take pride in craftsmanship over shortcuts, using high-quality materials and custom solutions that protect what matters most.
Get a custom quote today and discover how our system can give you true peace of mind, mile after mile.
You might also like
RV Roofing Solutions' Blog