Chalk It Up to Experience: Caring for Your Fiberglass RV Roof
Fiberglass RV Roofs: Strength, Style, and a Few Surprises
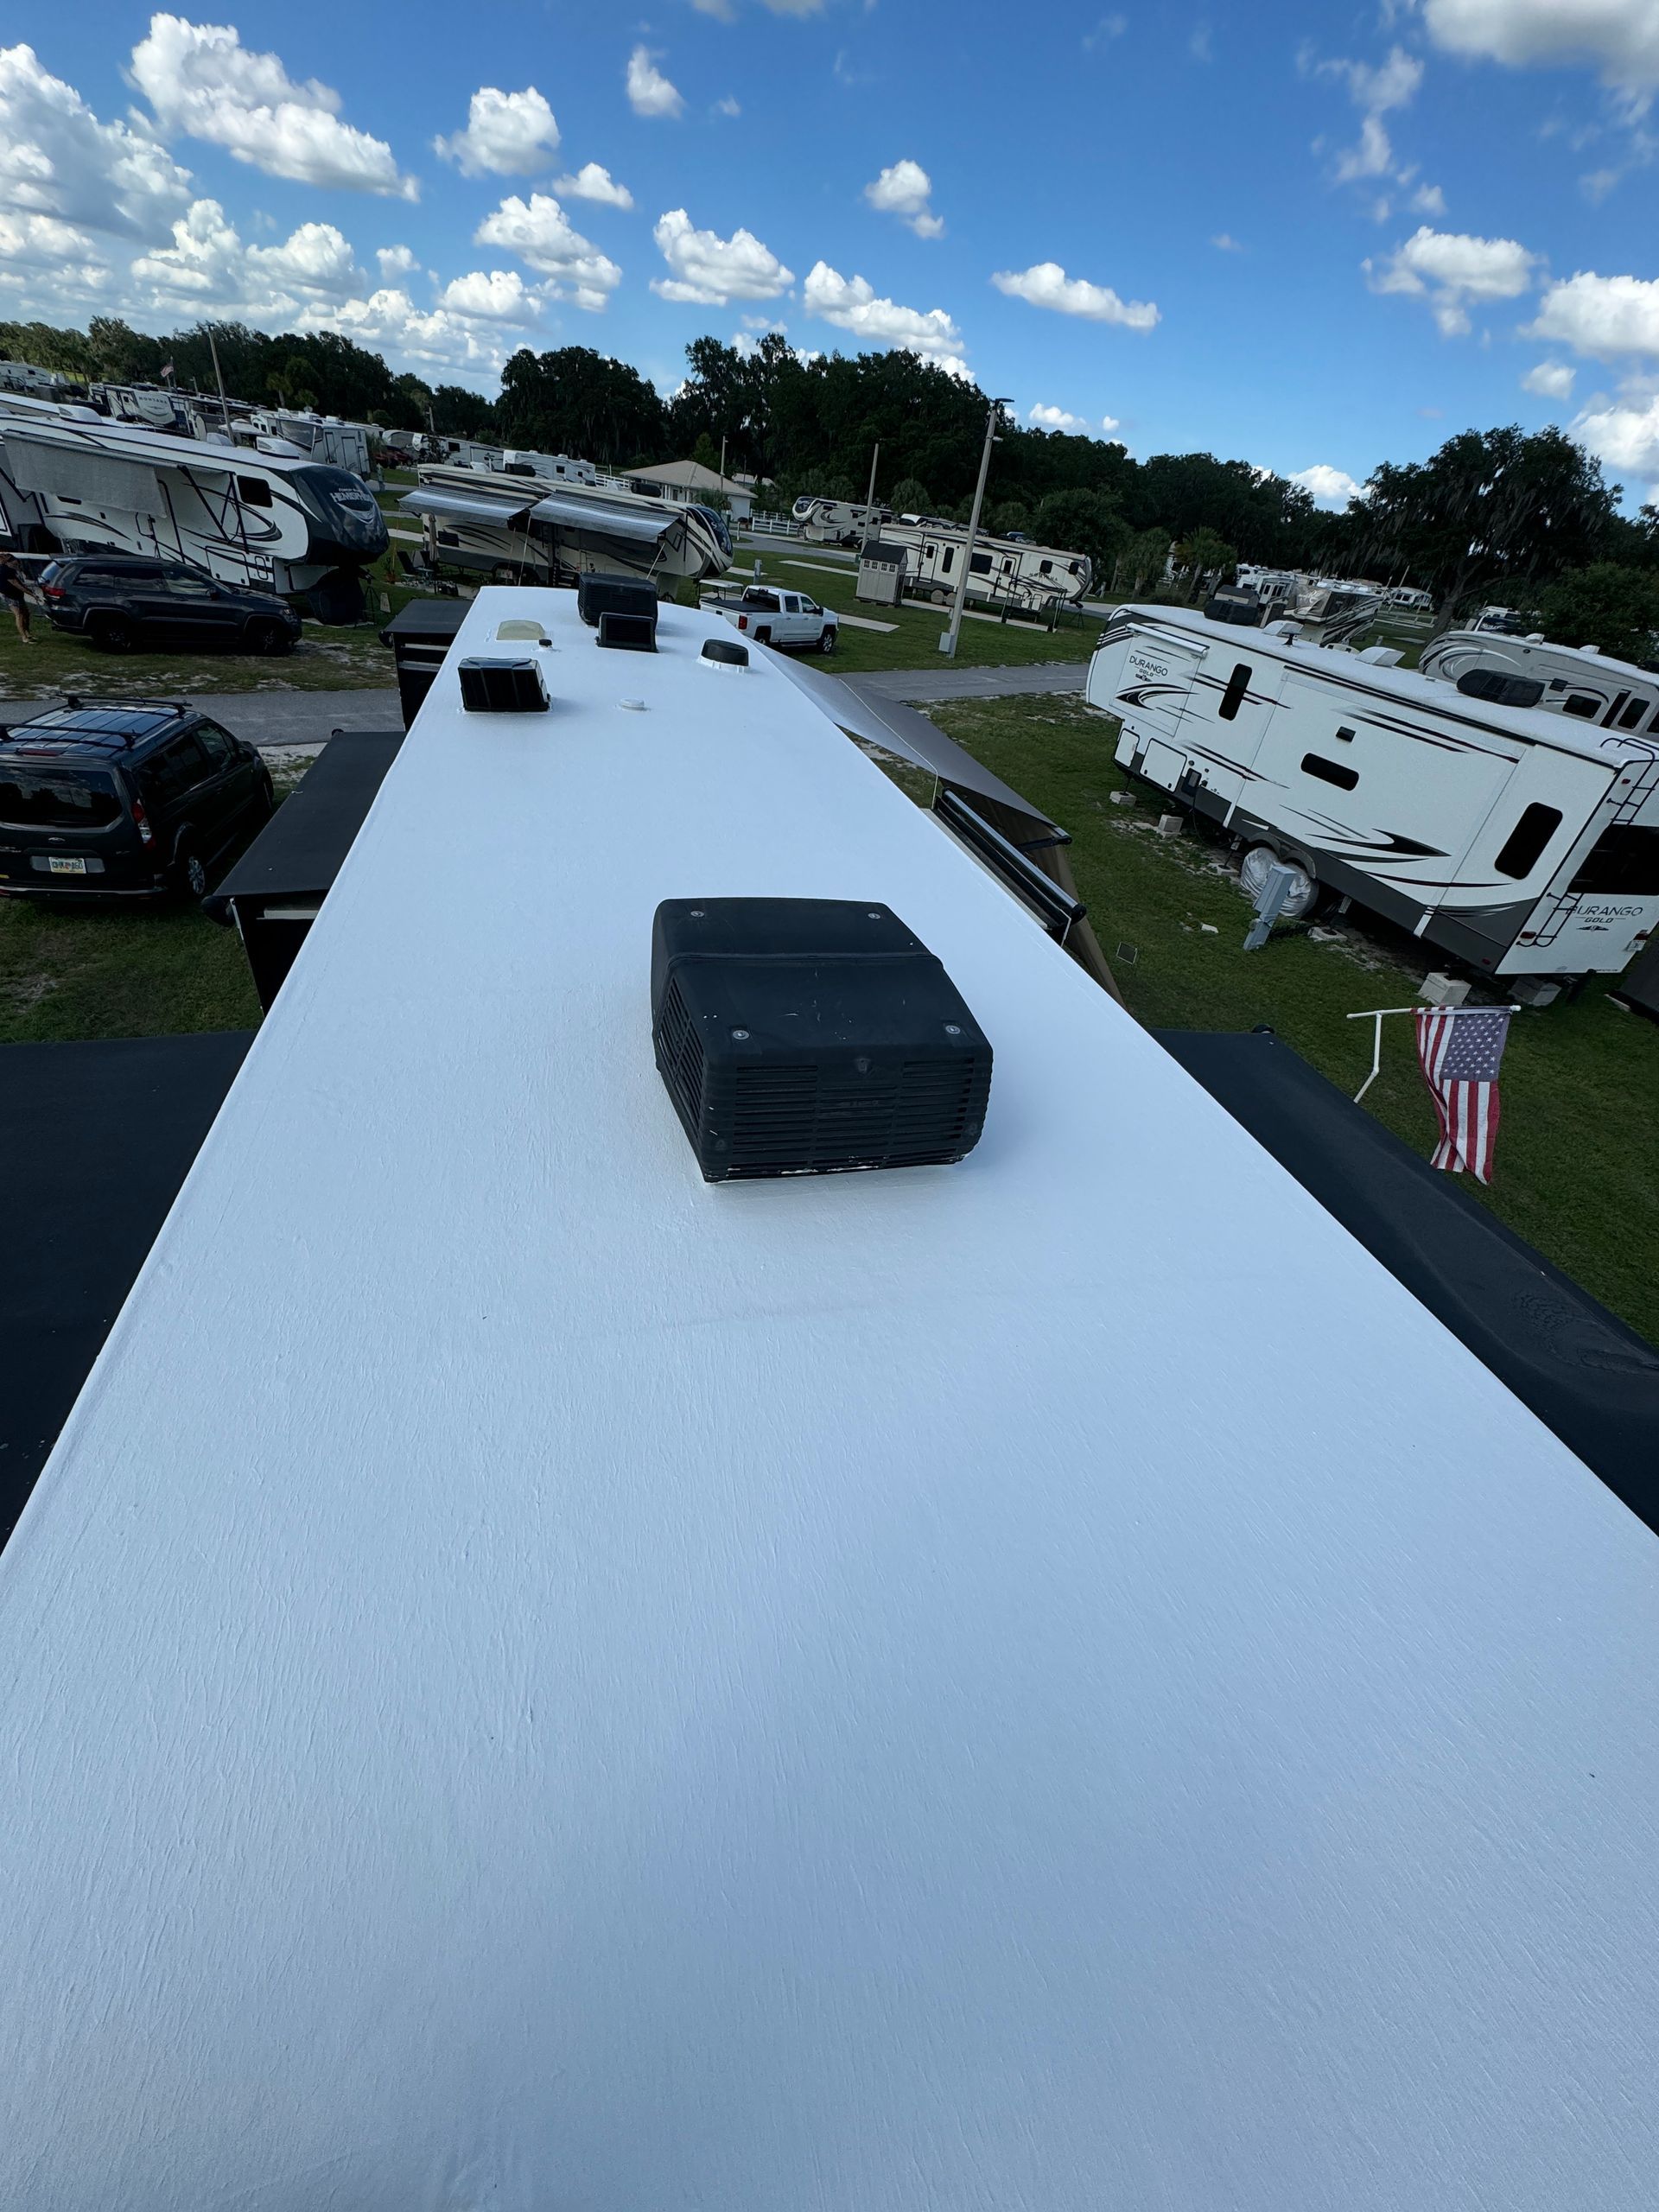
Fiberglass RV roofs definitely have their perks—but whether they’re “better” depends on your priorities. When it comes to protecting your RV, fiberglass offers some distinct advantages. These roofs are typically installed in large, rigid panels over a solid wood structure, making them highly durable—often lasting 20 years or more with proper maintenance. With fewer seams, the risk of leaks is significantly reduced, which is key to maintaining the structural integrity of your rig. Their sturdy surface also makes rooftop maintenance safer and easier, and the glossy finish delivers a clean, sleek look that resists scratches and dents.
However, durability comes at a cost—literally. Fiberglass RV roofs are usually more expensive upfront, which can increase the overall price of your RV. And if damage does occur, repairs aren’t cheap. Cracks, punctures, delamination, chalking, and spider or fissure cracking can be difficult (and costly) to fix, especially since finding an exact OEM replacement panel can be challenging. That could mean extended downtime while repairs are underway. The labor-intensive repair process often makes fiberglass roof replacements more expensive than rubber alternatives. Also, while fiberglass is strong, it’s heavier, which can reduce your rig’s cargo-carrying capacity—though this may not be a major concern if you’re driving a diesel pusher with a tag axle.
Maintaining a Fiberglass RV Roof: Protection Through Prevention
Caring for a fiberglass RV roof is all about preserving its sleek finish and long-term durability while avoiding costly repairs down the road. If you're already hands-on with RV maintenance, this may feel like second nature—but even the most seasoned RVers benefit from a solid care routine.
Routine Checks & Cleaning
- Clean every 3–6 months, or more often if parked under trees.
- Use a soft-bristle brush, telescoping pole, and a hose (avoid pressure washers near seals).
- Avoid washing in direct sunlight.
- You'll want to use an industry trusted cleaner like Aero Cosmetics Wash All Degreaser.
- Avoid harsh chemicals or anything abrasive that could strip the gelcoat.
- That roof will get slippery when wet, so be sure to wear non-slip shoes.
- Apply a UV Protection treatment like 303 Aerospace protectant every 6-12 months
This will help to remove gel coat oxidation and inhibit future damage caused by the sun’s ultraviolet rays.
Why it matters
Most fiberglass RV roofs are finished with a resin-based gel coat during manufacturing. Over time, exposure to UV rays leads to oxidation, which causes the surface to yellow, fade, or become chalky. Using a quality UV protectant like 303 Aerospace Protectant helps prevent oxidation, chalking, and fading—especially important in sunny climates or at high elevations. Regular treatments help maintain that like-new finish and extend the life of your roof.
Some RV owners prefer to hire a professional for UV treatments, but it’s important to do your homework. A rushed or careless application—what some call a “hot mop” approach—can leave bare spots where protection is lacking, which may lead to uneven fading or chalking. These treatments can cost anywhere from $300 to $1,000, depending on your location and service provider, and if done every 6–12 months, those costs can add up quickly.
Sealant Inspections: Don’t Skip Them
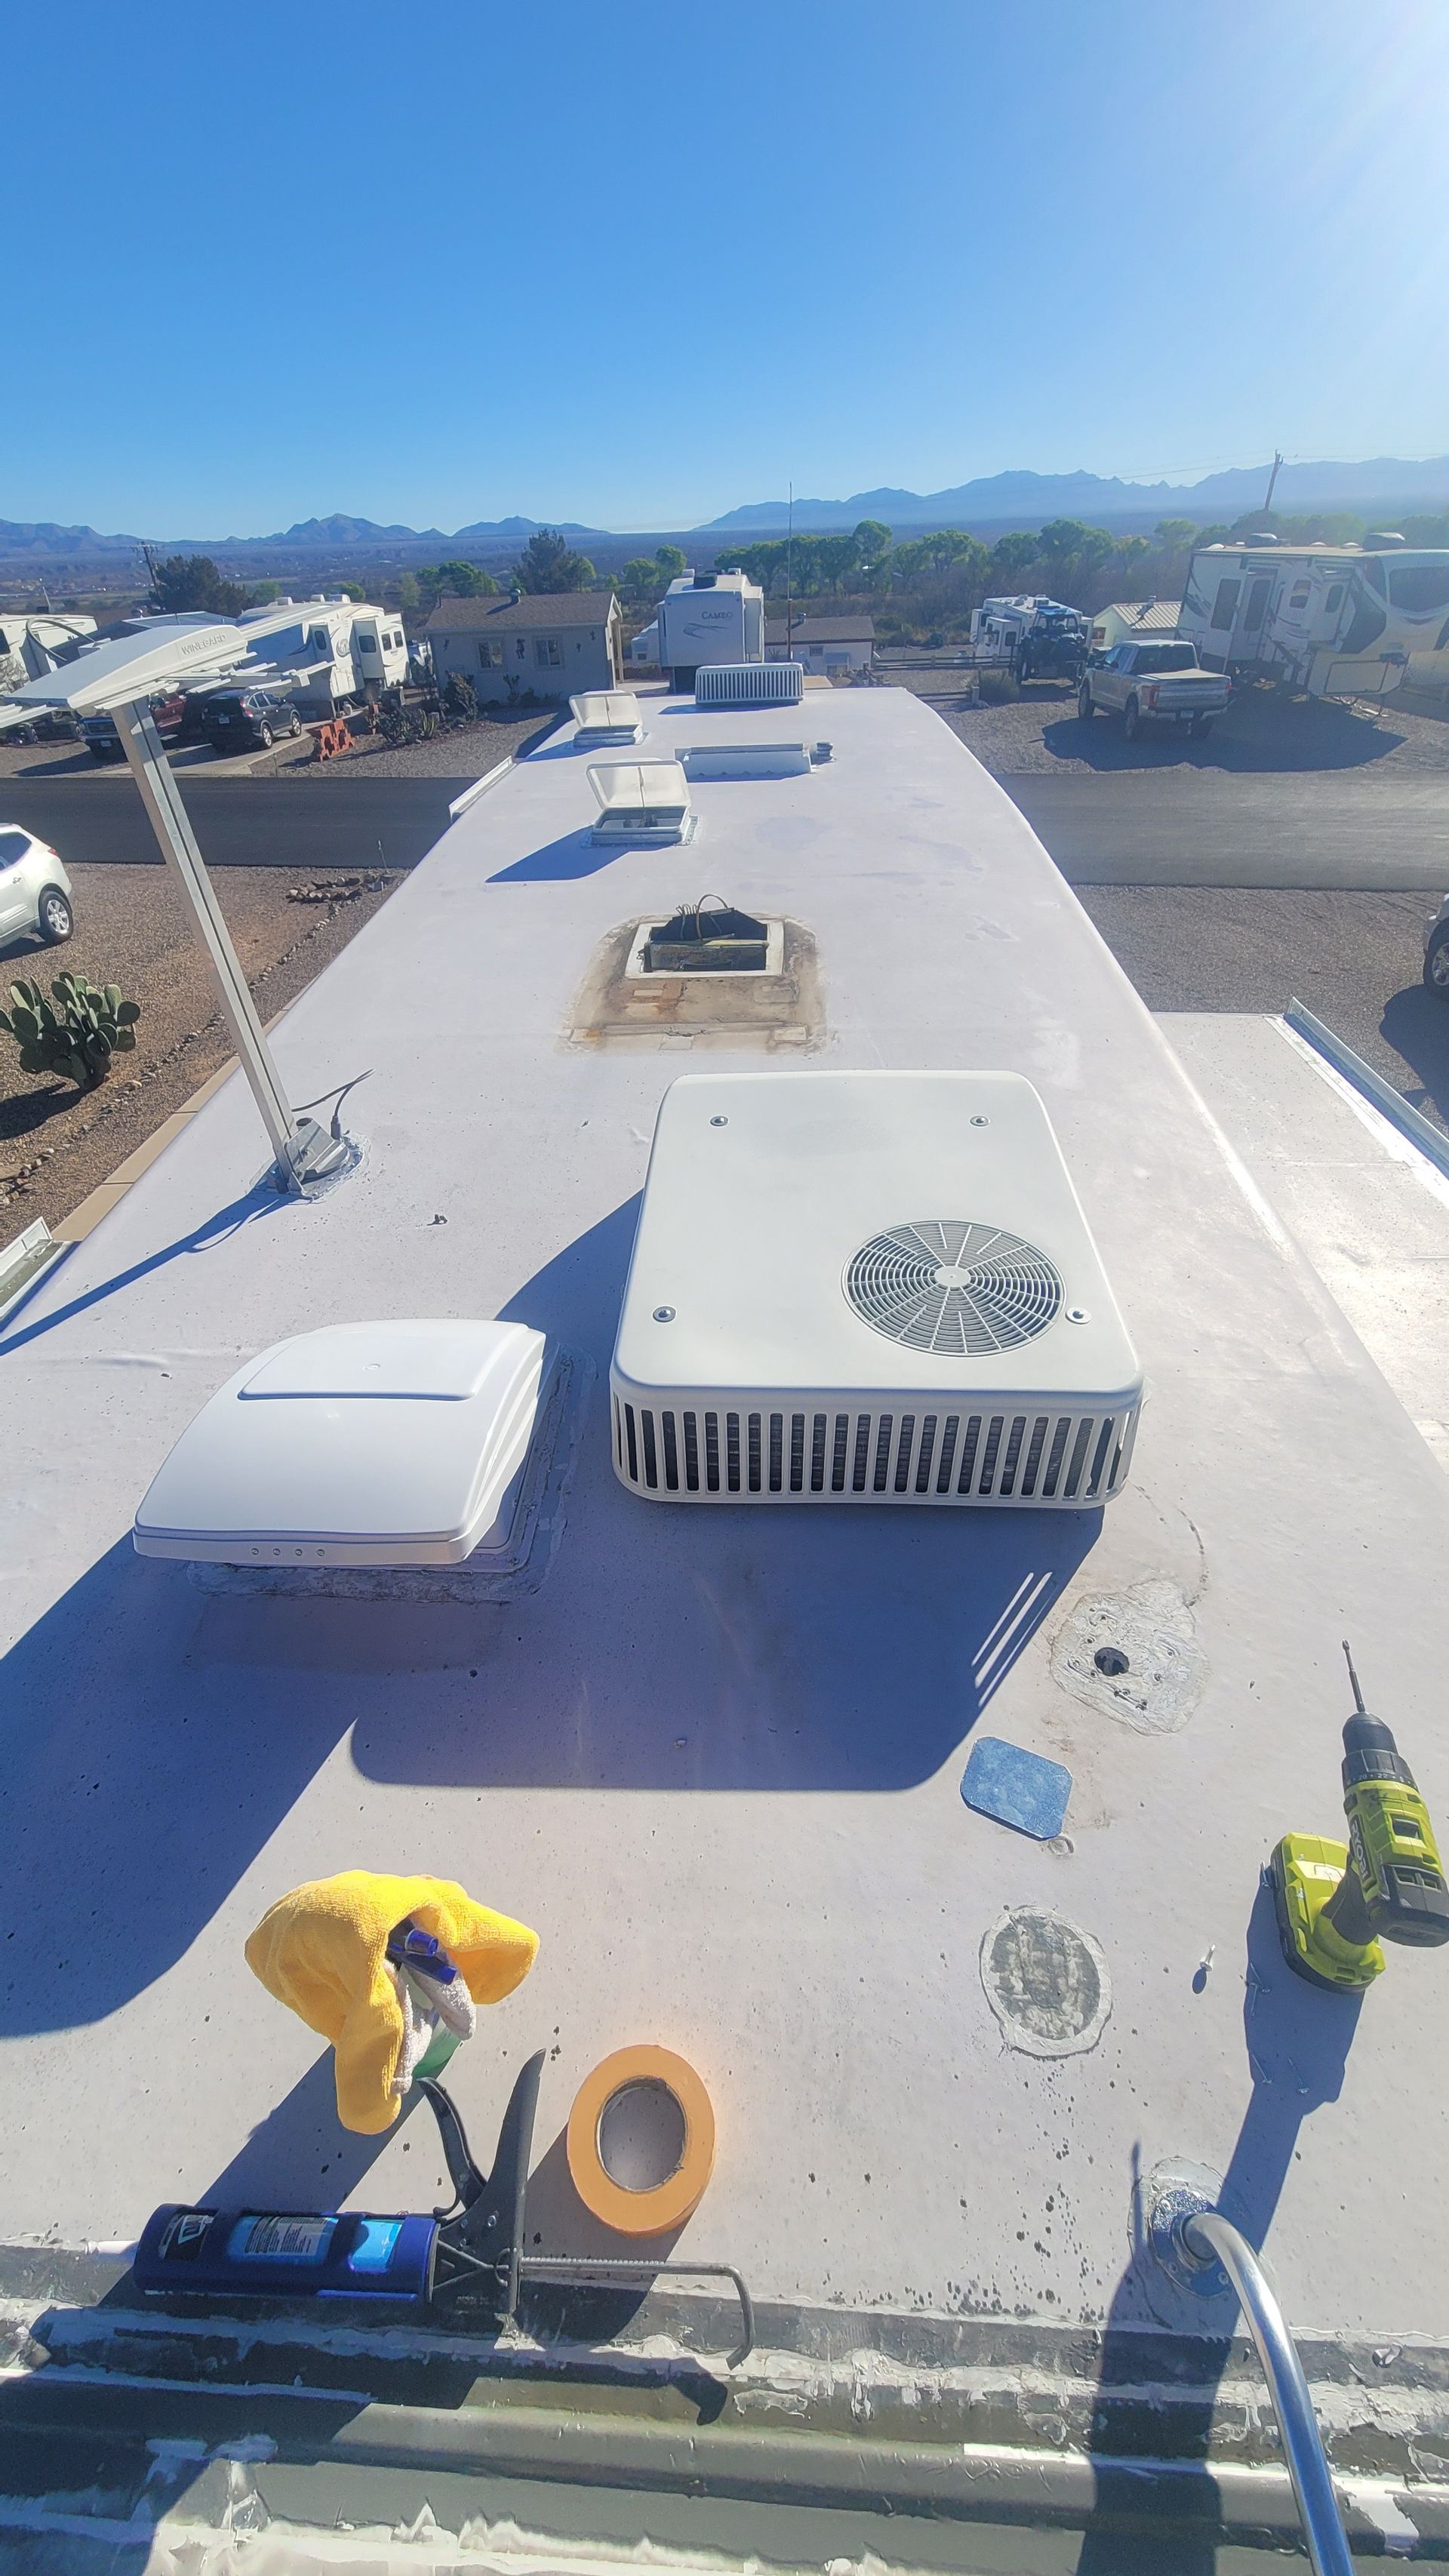
Just as critical, if not more so, is inspecting the roof sealants. At least twice a year, you should climb up and check around vents, A/C units, skylights, solar mounts, screws, the roof edge radius, and the front/rear termination bars. Even a tiny crack or gap in the sealant can let water in, leading to hidden damage that may not be discovered until it's too late.
It’s not enough to glance at the roof from the ground - you need to get up there and inspect closely. Staying ahead of sealant failures is one of the best ways to prevent water intrusion and protect your RV investment for the long haul.
Common Issues with Fiberglass RV Roofs: What to Watch For
At first glance, a fiberglass RV roof might seem like a “set it and forget it” option—requiring only occasional polishing and inspections. Compared to rubber roofs, which may need more frequent maintenance, fiberglass is often viewed as the longer-lasting choice. However, while rubber roofs are easier to patch on the fly, fiberglass roofs come with their own unique set of challenges.
One early warning sign of fiberglass roof deterioration is the appearance of white streaks running down the sides of your RV. These streaks are often an indication that the roof is chalking, a result of oxidation breaking down the gelcoat finish.
Here are some common issues with Fiberglass roofs
- Delamination
This occurs when the fiberglass layer separates from the underlying plywood or luan substrate. You might notice bubbles, soft spots, or a spongy feel underfoot. Delamination is usually the result of water intrusion or adhesive failure and can quickly worsen if left unchecked.
- Cracks & Stress Fractures
Due to flexing during travel or shifts in temperature, fiberglass can develop small hairline cracks. While they might seem cosmetic at first, these cracks can allow moisture in—leading to rot or structural damage beneath the surface.
- UV Degradation
Without consistent application of a UV protectant, the roof’s gelcoat can oxidize, resulting in a dull, chalky appearance. This not only affects your RV’s visual appeal but also reduces the protective integrity of the surface over time.
- Leaks Around Seams & Fixtures
Even though fiberglass roofs typically have fewer seams, the areas around vents, skylights, edges, and other penetrations still rely heavily on sealant. Over time, these sealants degrade, crack, or pull away—making leak prevention an ongoing responsibility.
- Slippery Surface
When wet, waxed, or recently cleaned, fiberglass can become extremely slick. This poses a safety hazard during maintenance. Always wear non-slip shoes and take extra care when walking on a fiberglass roof.
The Challenge of Fiberglass Repairs
While rubber roofs can usually be patched quickly and inexpensively, fiberglass repairs often require a more involved process—including sanding, applying resin, and refinishing with gelcoat. In some cases, hiring a professional may be the best route to ensure a proper, seamless repair.
If your fiberglass roof is oxidized or neglected, reviving it takes time—and the right materials. Some RV owners opt for marine-grade paints like Pettit EasyPoxy, which is a topside boat paint designed for a glossy, durable finish. However, products like this must be used with caution. Please note that if you are using an epoxy of any kind it’s best used in a well-ventilated area or outdoors. It can be flammable: Flash points can start around 113°F, so avoid open flames or sparks during application. Wear
Protective gear: Gloves, goggles, and a respirator are recommended—especially if working in enclosed spaces.

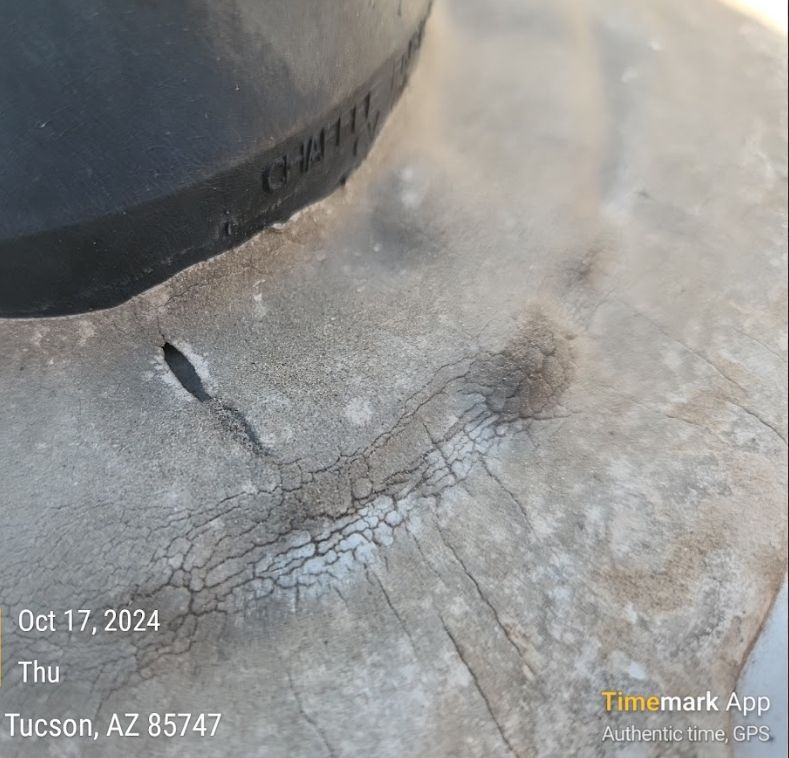
Is Your RV Roof Telling You Something? Signs of UV Degradation
At RV Roofing Solutions, we’ve seen firsthand how easily signs of UV degradation can be overlooked. That chalky, powder-like residue on your fiberglass roof isn’t just surface dirt—it’s a warning. It means the gel coat, your RV roof’s protective barrier, is beginning to break down under the constant exposure to the sun’s UV rays. As oxidation progresses, the shiny finish fades, leaving your roof weaker and more vulnerable to cracks and water intrusion.
Don't let neglect lead to costly repairs!
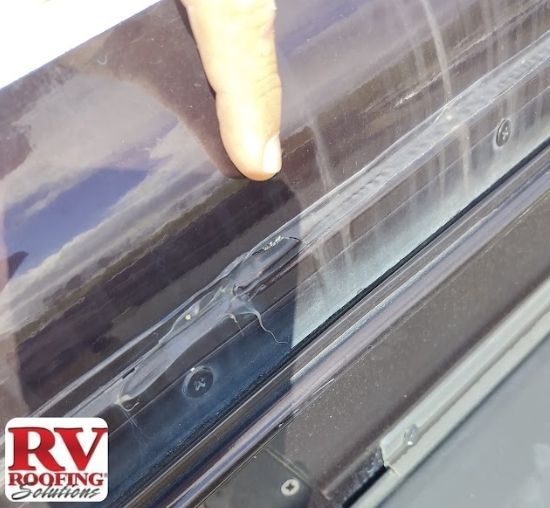
Spider & Fissure Cracks: More Than Just Surface Trouble
Spider cracks—those fine, web-like lines—often form from regular flexing during travel, temperature changes, or minor impacts like falling tools or hail. While they might be purely cosmetic, if you notice them spreading or appearing near seams, it could signal deeper structural issues.
We understand that fissure cracks can be an RVer's worst nightmare. These deeper, linear cracks often indicate fatigue in the fiberglass layers and can signal bigger problems, like water intrusion or damage from freeze-thaw cycles. If your RV shows signs of structural movement or poor bonding between layers, ignoring these fissures can lead to leaks, bigger issues or even delamination.
The Hidden Danger: You Might Not Know It’s Happening
One of the most surprising things we hear from customers is, “I had no idea my roof was in that bad of shape.” That’s because fiberglass roof degradation can be incredibly subtle, especially early on.
- Chalking often looks like ordinary dust.
- Spider cracks may be mistaken for dirt or hairline scratches.
- Fissure cracks can hide under solar panels, sealants, or rooftop accessories.
- Even after a good wash, the roof may appear clean but still be showing early signs of oxidation.
Many RV owners assume a clean roof equals a healthy one. Unfortunately, that isn’t always true.
The Hands-On Test: A Simple Way to Check
A quick way to test for gel coat oxidation is to physically run your hand across the roof. If you see
white residue on your fingers or dark clothing afterward, your gel coat is likely breaking down. This chalky transfer is one of the clearest signs of UV damage—and a call to take action.
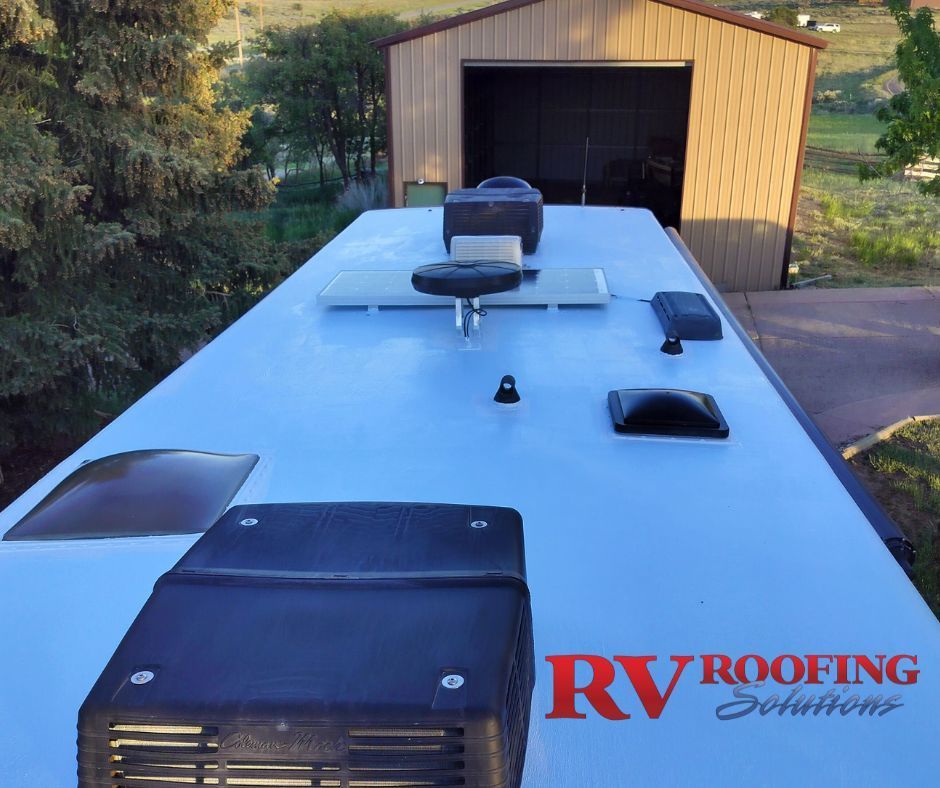
The Maintenance-Free RV Roof You’ve Been Waiting For
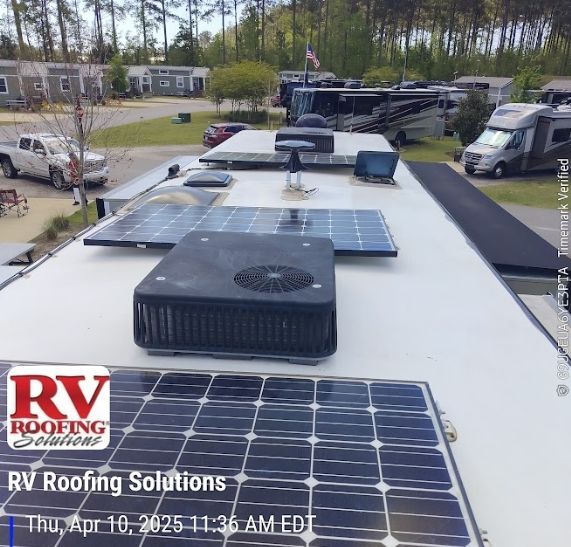
At RV Roofing Solutions, we believe your roof should work for you—not the other way around. That’s why we’ve developed a maintenance-free roofing system designed to protect your RV from harsh elements while eliminating the need for constant upkeep. No more UV treatments. No more caulking. Just long-lasting protection and peace of mind.
Our innovative system reflects the sun’s harmful rays to help keep your RV cooler in the summer and warmer during cold snaps. Made from 100% acrylic, low-VOC material, it forms a seamless, flexible barrier that expands and contracts with your RV’s movement—perfect for life on the road. Because of its low VOC rating, there’s virtually no off-gassing during application, making it safer for both you and the environment.
Why RV Owners Are Making the Switch
More than 60% of our clients choose RV Roofing Solutions before they even experience a leak. Why? Because they want to avoid the headaches of recurring maintenance, sealant inspections, and costly water damage.
Our expertly installed roofing system typically takes just 3 full days to complete, provided no extensive repairs are needed. Once installed, you’re done, no routine re-caulking, no special UV protection treatments, and no chalky residue to worry about.
Nationwide Service, Backed by Experience
With over 20 years of experience, RV Roofing Solutions delivers quality you can trust. Our nationwide mobile installation teams come directly to your RV, whether you’re at home, a campground, or a storage facility. We make it easy to protect your investment without interrupting your lifestyle.
We proudly offer a 10-Year Material & Labor Transferable Warranty on every professionally installed roof, so you can travel with confidence knowing your roof is covered.
Exclusive Club Member Benefits
We’re proud to be a Tiffin Allegro Club Benefit Partner and a Family RV Association Member Benefit Partner. If you're part of these communities, you’ll enjoy exclusive savings when you book with us, plus the same high-quality service brought right to your doorstep.
Your Journey Shouldn’t Stop for Roof Repairs
Let RV Roofing Solutions help you protect your RV for the long haul, so you can spend more time exploring and less time worrying about what’s overhead.
Comparing the Costs: OEM VS Aftermarket Roofing Systems
When it comes to RV roofing repairs, the cost can vary widely depending on several factors—including the size of your RV, your location, the materials used, and whether you choose an OEM (Original Equipment Manufacturer) roof replacement or an aftermarket solution like the one offered by RV Roofing Solutions.
On the high end, OEM fiberglass roof replacements can run $18,000–$20,000 or more, especially when completed at a dealership or manufacturer facility. These costs often include extended wait times, labor-intensive processes, and sourcing factory-specific materials—which can be both costly and hard to find.
In contrast, our RV Roofing Solutions maintenance-free system is typically 30%–50% less than OEM replacements. Plus, with financing options available, you can break your investment into manageable monthly payments—making it easier than ever to protect your RV without straining your budget.
Timing Is Everything
It’s true—depending on the season, wait times for roofing repairs or replacements can stretch from a few weeks to several months. But one major advantage of working with RV Roofing Solutions is that our mobile teams operate year-round, making winter a great time to schedule your installation, especially if you're snowbirding in the south and not actively traveling.
No Surprise Pricing: We Lock It In
When you receive an approved quote from RV Roofing Solutions, you’re protected by our price lock guarantee. This means that even if our material or labor costs go up after your contract is signed, your pricing stays the same. If any unforeseen issues arise during installation, we’ll walk you through them and provide a clear change order that must be signed before any additional work begins. Transparency and trust are key values in our service model, and we’re committed to keeping your project on time and on budget.
You might also like
RV Roofing Solutions' Blog