The No‑Nonsense Guide to RV Roof Caulks (From People Who Don’t Even Use Them)
Your Simple Guide to RV Roof Sealants, Compatibility Issues, and Smart RV roof DIY Maintenance Choices
Step 4: Choose the right type of caulk for the job
Here’s the quick, conversational breakdown.
Self-leveling (for flat roof surfaces)
Self-leveling (or “sag”) caulk is made for flat, horizontal surfaces where you want the product to naturally flow out and create a smooth, even seal—think roof seams, vents, skylights, and AC units. It’s easy to apply, settles into a clean finish, and works especially well on wide seams. Just keep in mind that it’s only for level surfaces; it will run or drip on slopes or vertical areas, and some formulas may react with certain roofing materials, so compatibility matters.
• Use it: Around roof vents, skylights, AC units, roof seams.
• Why: It spreads out on its own and covers the area evenly.
• Tip: Don’t use it on vertical surfaces unless you like drips.
Non-sag (for vertical/angled areas)
Non‑sag (or non‑leveling) caulk is your go‑to when gravity isn’t on your side. Because it’s thicker and tackier, it stays exactly where you put it—making it ideal for vertical or angled spots like sidewalls, trim, ladder mounts, and window frames. It grips well, won’t drip or slump, and gives you the control you need for detailed work. Just remember that its thicker texture can be harder to smooth out, and if you get a little heavy‑handed, it can look messy fast, so a steady hand goes a long way.
• Use it: Sidewalls, trim, ladder mounts, front/rear caps.
• Why: It stays put and doesn’t slump.
• Tip: Apply in smaller beads—you can always add more.
Polyurethane (strong, long-term sealant)
Polyurethane caulk is the heavy‑duty workhorse of sealants—the one you reach for when you want a strong, flexible, long‑lasting seal along roof edges, seams, and metal‑to‑metal or metal‑to‑fiberglass joints. It bonds incredibly well, stands up to UV, and can last for years, which makes it a favorite for serious, long‑term repairs.
The trade‑off? It’s not compatible with every roof membrane, it can be a bear to remove or redo once it’s cured, and it usually takes longer to fully set. In other words: fantastic when you’re sure it’s the right match, not so great for “let’s just try this and see.”
• Use it: Where you need a tough, flexible, long-lasting bond—edges, metal seams, high-stress areas.
• Why: It sticks like crazy and holds up well.
• Watch out: It can be hard to remove and may not play nice with every roof type. Check compatibility.
Silicone (the “maybe” product)
Silicone caulk is one of those products that sounds like a great idea—flexible, waterproof, and easy to find—but it’s often misunderstood in the RV world. It performs well on non‑porous surfaces like glass, metal, and certain accessories, which is why you’ll see it used around windows or trim. But on many RV roof materials, silicone simply doesn’t adhere well, and once it’s on, nothing else will stick to it—not even more silicone—so future repairs can turn into a headache fast.
If you own a rig with a fiberglass roof and the owner’s manual specifically calls for silicone, treat it as an all‑or‑nothing situation: remove the existing silicone completely and fully replace it—no shortcuts, no spot‑patching over old beads. Silicone is best reserved for non‑roof components, manufacturer‑specified situations, or truly temporary fixes where you understand you may be creating extra work down the road.
• Use it: Around windows, some trims, and non-roof components if recommended.
• Why: It’s flexible and waterproof.
• Big caution: Many RV roof materials don’t love silicone, and once it’s on, nothing sticks to silicone—not even more silicone. It can make future repairs a pain.
So, when is silicone the right choice?
• When the manufacturer specifically says to use it.
• When you’re sealing non-roof components like certain windows or metal trim.
• When you accept it might complicate future work.
Hybrid sealants (MS polymer / tripolymer)
Hybrid sealants like MS Polymer and Tripolymer are the overachievers of the RV world—they flex like silicone, stick like polyurethane, and generally play nicely with most modern roof materials. They’re fantastic for seams, accessories, and trim because they offer strong adhesion, UV stability, and long-term durability without the chemical‑reaction drama you get from some other products.
But they’re not perfect. They tend to cost more, they still require proper surface prep, and while they’re usually lower in VOCs than traditional polyurethane, some formulas can have a mild odor during application. Most are considered more environmentally friendly than older solvent‑heavy sealants, but “eco‑safe” varies by brand, so it’s worth checking the label if that matters to you. Overall, hybrids are a solid choice—just not a magic wand.
• Use it: When you want good adhesion, flexibility, and compatibility with most modern RV roofs.
• Why: They’re kind of the “best of both worlds” between silicone and polyurethane.
• Tip: Great option if you’re unsure and want something more forgiving—just still check the label for roof compatibility.
RV roof tape is one of those products that feels like a miracle when you’re in a bind—and honestly, in the right moment, it kind of is. But it’s also one of the most misused “quick fixes” we see on RV roofs. Tape was never meant to replace caulk or long‑term sealants, and when people treat it like a permanent solution, it usually creates bigger problems down the road.
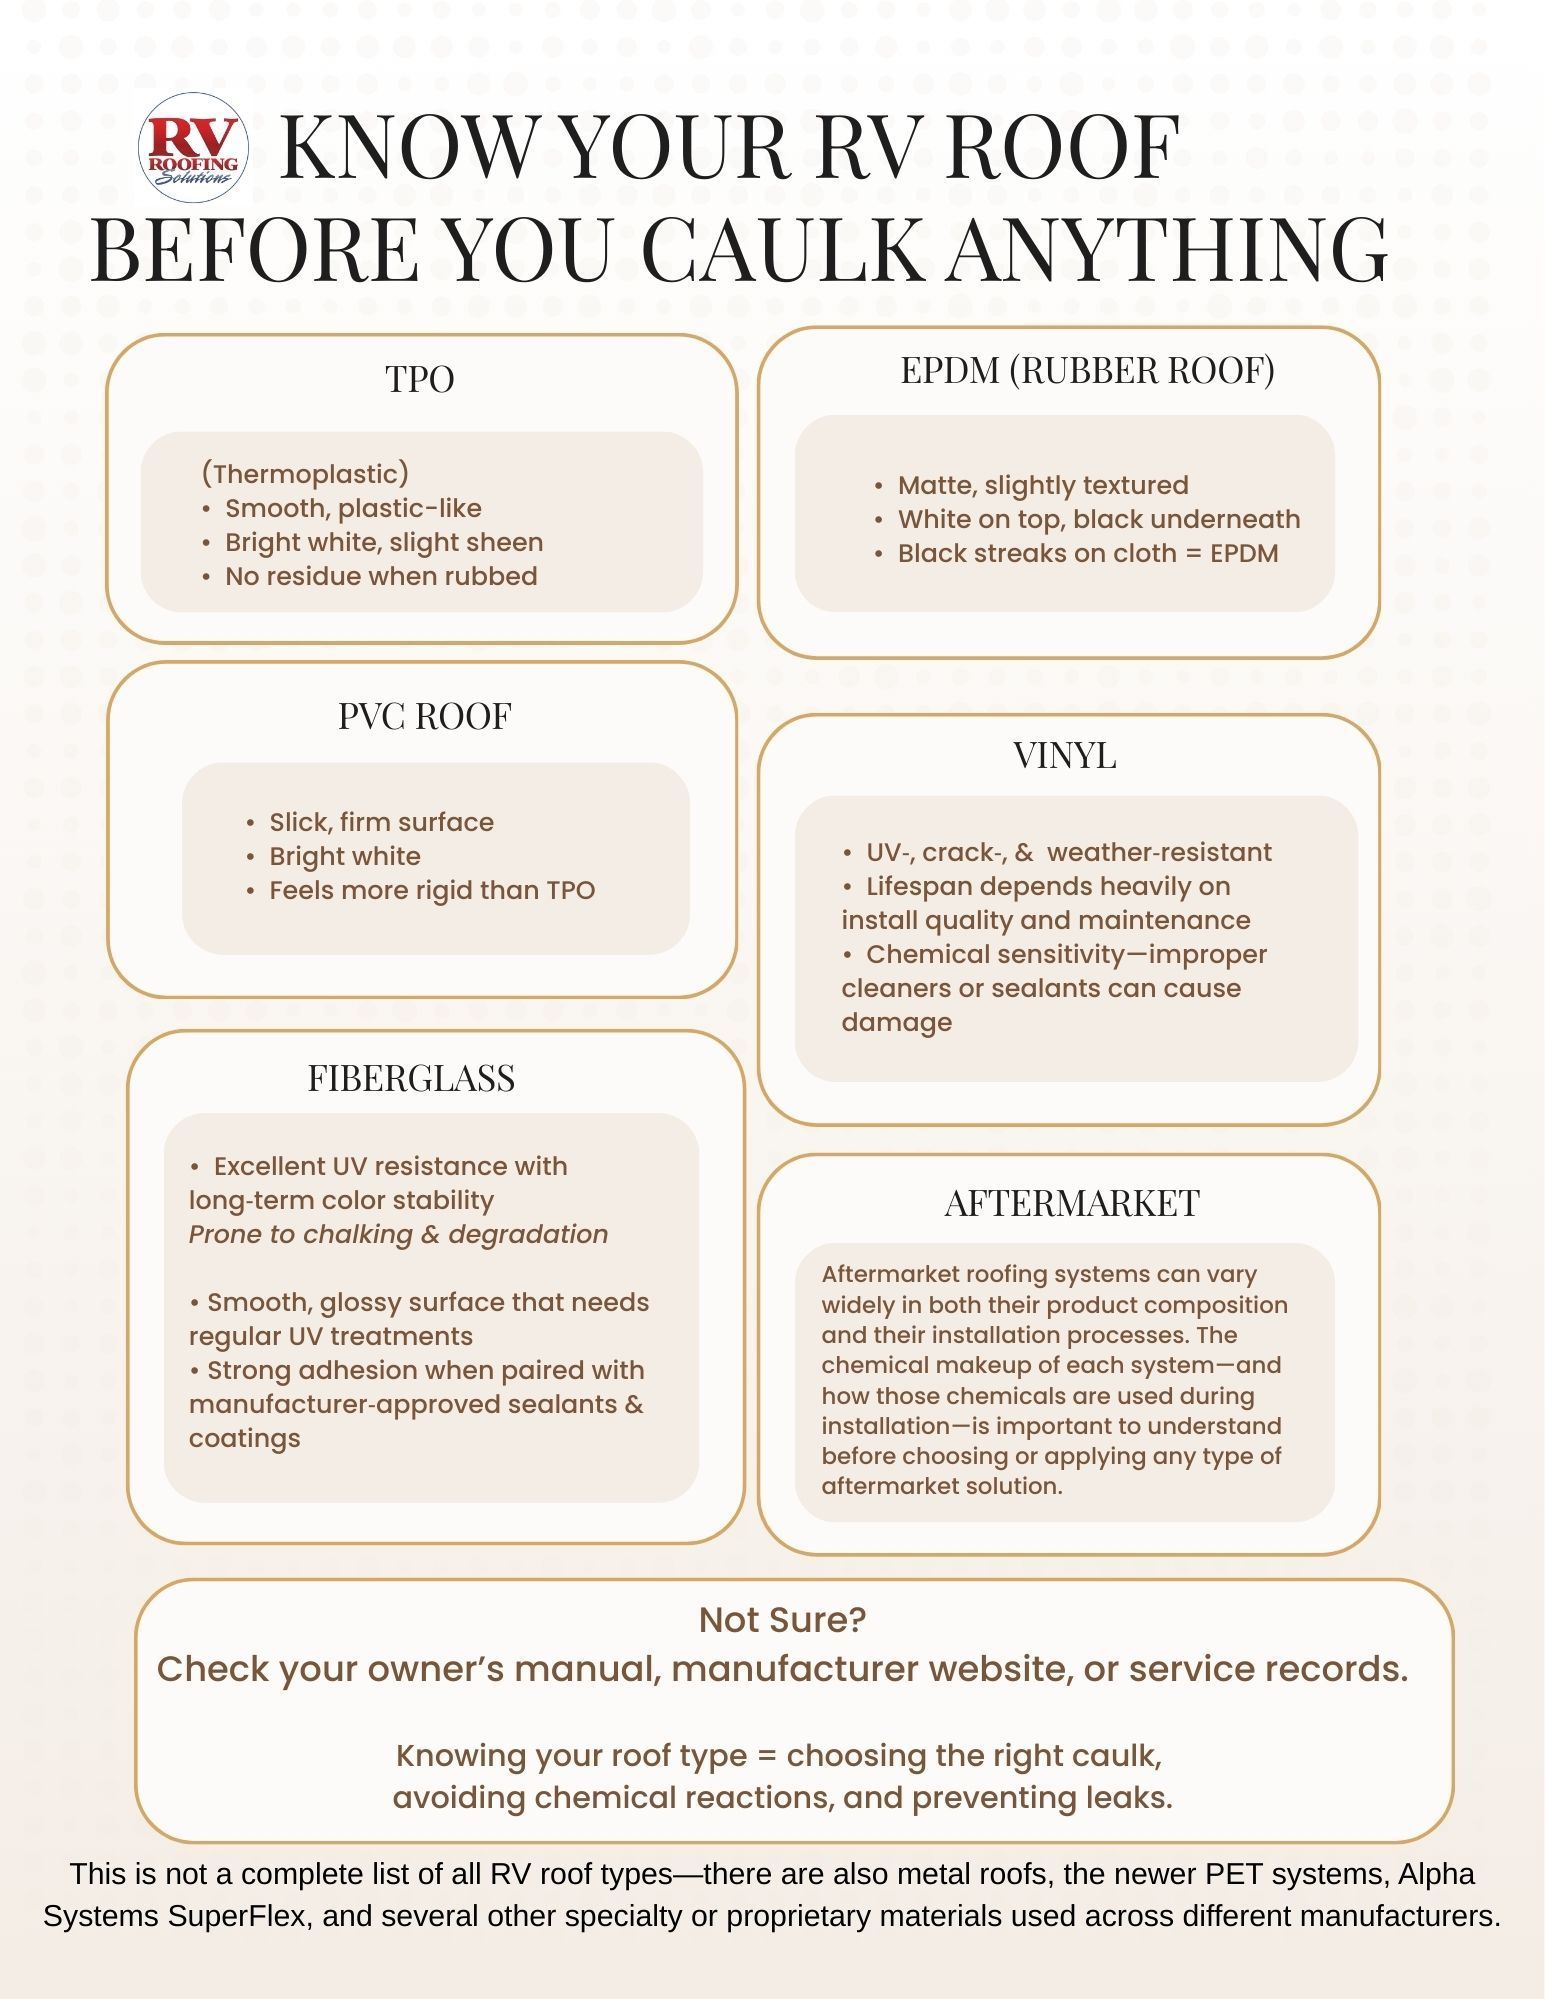
Compatibility Matters
Before you grab a tube of anything, you need to know:
• What material your roof is made of (EPDM, TPO, fiberglass, aluminum, etc.)
• Whether the caulk is chemically compatible
• Whether the surface is horizontal or vertical. If you are not sure check your owners manual or reach out to the manufacturer.
• Whether you’re doing a temporary patch or long-term repair using the wrong product can cause bubbling, peeling, cracking, or even chemical breakdown of your roof membrane.
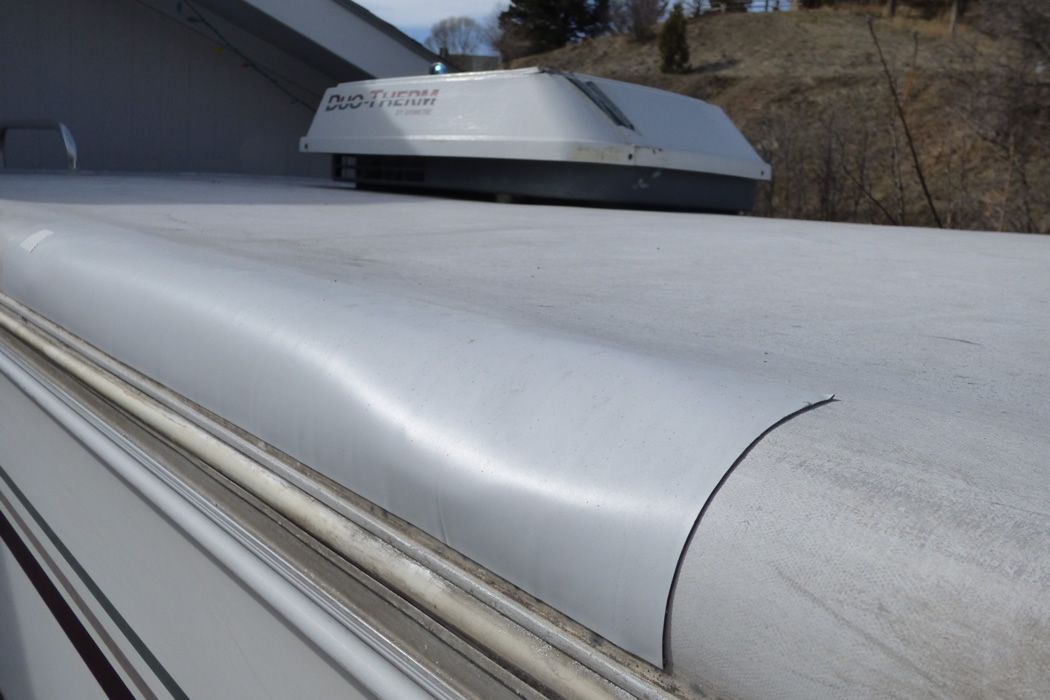
Step 5: Prep the area like it matters (because it does)
Good caulk on a dirty surface is still a bad repair.
1. Clean the area
• Remove loose, cracked, or peeling old caulk (carefully, so you don’t damage the roof).
• Wipe away dirt, dust, and debris.
2. Use the right cleaner:
• Use lots of water and an RV roof-safe cleaner.
• Avoid harsh solvents unless the product specifically allows it.
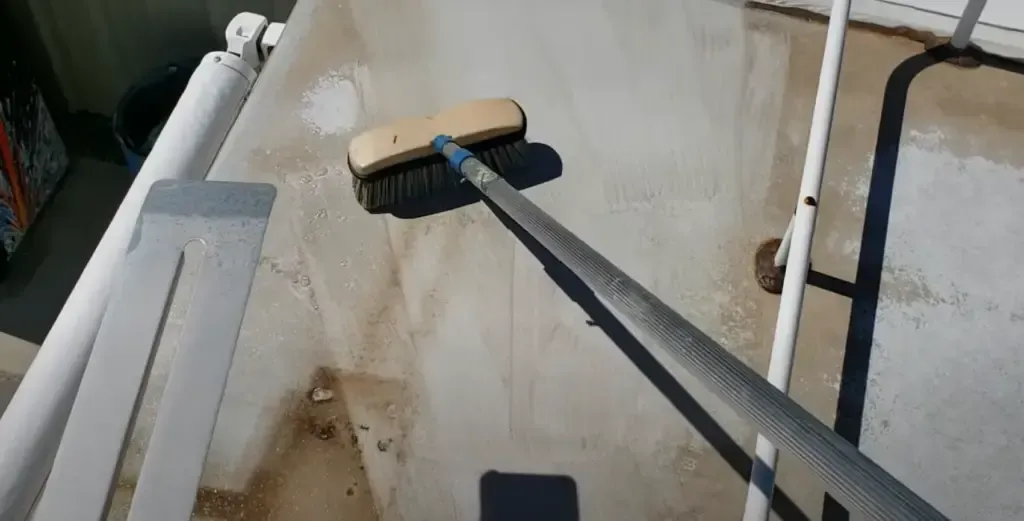
We get asked all the time what to use to clean an RV roof. We get told all the time, a lot of people reach for Dawn dish soap, Awesome cleaner, or Simple Green—and the truth is, those products can strip sealants, dry out caulk, and cause long‑term damage. Product's that are great for getting oil off baby birds aren’t always great for your RV roof. Those same degreasers can break down the very sealants faster that keep water out.
You want an industry‑approved cleaner, something that won’t make your roof slick as snot and won’t eat away at your gel coat, the caulk, or the sides of your RV as it runs down. And whatever you use, make sure you rinse with lots and lots of water.
People often ask whether they can use a pressure washer on their RV roof. The short answer is you really shouldn’t, especially on membrane roofs. A pressure washer set too high can actually tear the membrane, and I’ve even known companies that build their entire reputation on “finding” those tears after they’ve blasted the roof with high pressure.
A proper roof wash doesn’t require force; it requires time, water, and the right tools. A soft brush and plenty of water will get the job done without risking damage. A thorough cleaning typically takes 2–3 hours, depending on debris, dust, and how long it’s been since the last wash.
3. Dry completely:
• Moisture under caulk = trapped problems.
If you’re thinking, “This feels like overkill,” that’s usually a sign you’re doing it right.
Step 6: Apply the caulk
Now for the part everyone rushes—and regrets.
1. Cut the tip at an angle:
• Smaller opening = more control.
• Start small; you can always widen it.
2. Steady, even pressure:
• Move the caulk gun at a consistent speed.
• Aim for a smooth bead, not a mountain range.
3. Let self-leveling do its thing:
• On flat surfaces, don’t overwork it. It will spread.
4. Tool non-sag if needed:
• Use a gloved finger or plastic tool to smooth it.
• Don’t smear it all over the place—keep it on the seam.
You’re not frosting a cake; you’re sealing a gap. Neat and intentional wins.
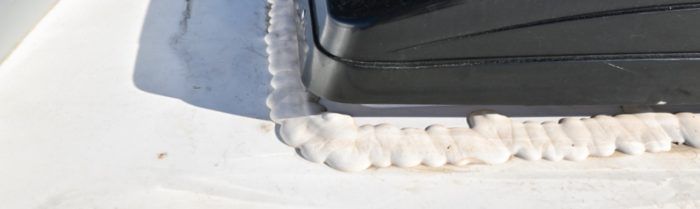
Bubbles in caulk… it’s something we’re seeing more and more. Many manufacturers have switched to pneumatic caulking guns on the production line. They’re fast and efficient, but that air pressure often forces tiny bubbles into the bead of caulk.
Here’s the problem: those bubbles almost always pop over time. And when they do, you’re left with a pinhole—sometimes several—that becomes a perfect entry point for water. It doesn’t gush in; it creeps in slowly, quietly, and by the time you notice the leak, the damage underneath is already done.
A clean, solid bead of caulk isn’t just about looks. It’s about preventing the kind of hidden water intrusion that ruins roofs, decking, and walls long before you ever see a stain.
Step 7: Let it cure—and don’t rush it
Every product has its own cure time. Read the label (yes, really).
• Avoid rain if possible during the initial cure window.
• Don’t poke it every 10 minutes to “see if it’s dry.”
• Give it the time it needs to fully bond and seal.
Once cured, do a quick visual check:
• Any gaps?
• Any spots you missed?
• Any areas that pulled away?
Touch up if needed.
Step 8: Know when to stop caulking and consider a bigger solution
Here’s the honest part:
If you’re up on your roof every season chasing cracks, patching leaks, and layering new caulk over old repairs, you’re not maintaining anymore—you’re managing a slow failure. When your roof starts showing signs like a crackled surface, sticky spots, or chalking fiberglass, that’s your rig telling you the problem is bigger than what another bead of caulk can fix.
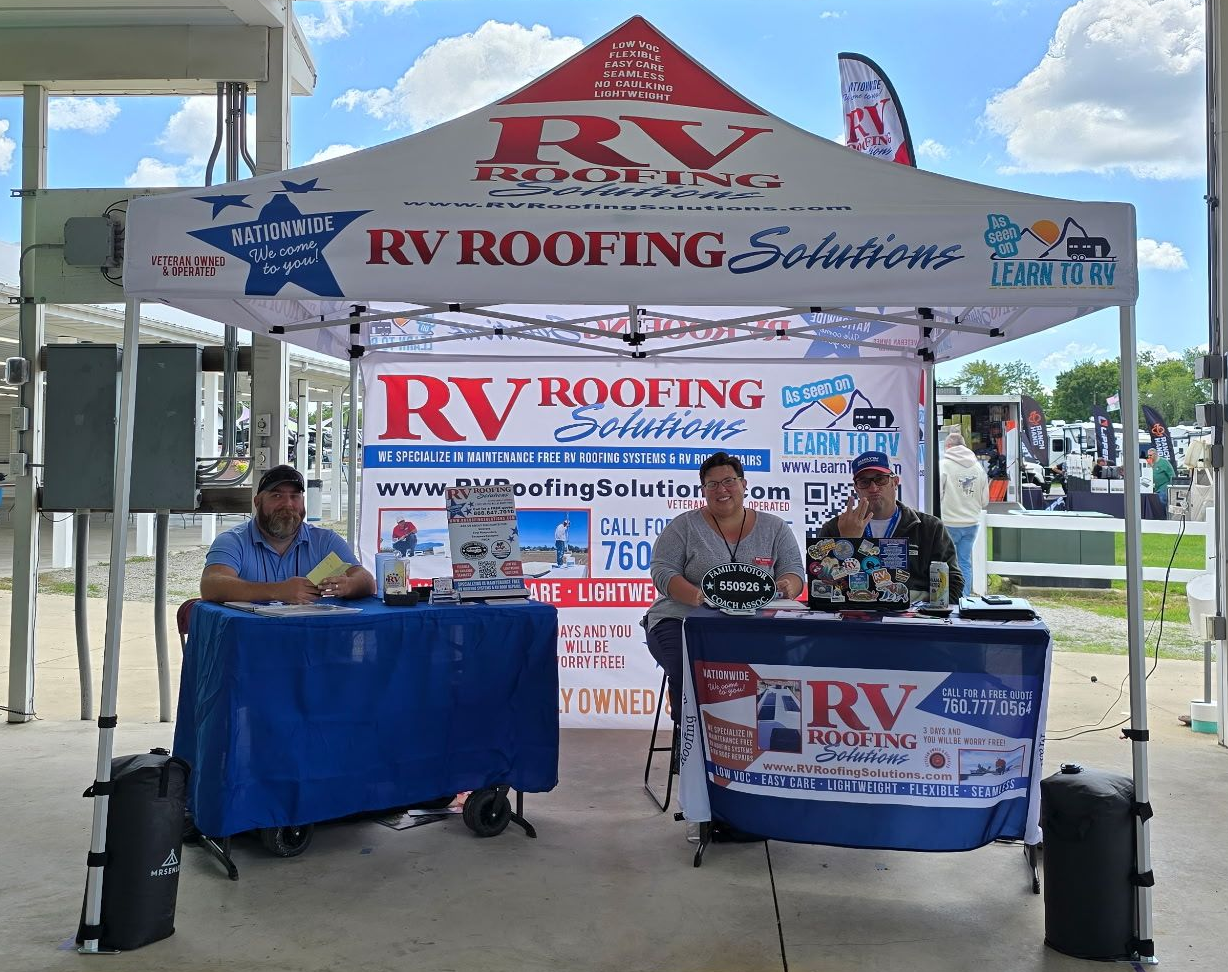
That’s exactly why our RV Roofing Solutions maintenance‑free system doesn’t rely on traditional caulk at all. Instead of keeping you on the hamster wheel of scraping, resealing, and paying for the same repairs year after year, our system gives your RV long‑term protection from UV rays and further roof degradation. Once installed, upkeep is as simple as a gentle wash twice a year—no climbing up there with tubes of sealant, no guessing which product is compatible, and no more seasonal stress.
Our RV Roofing Solutions system is a low‑VOC, professionally installed upgrade designed to break the cycle of constant caulking and give your roof the durability it should’ve had from the start. But until you’re ready for that kind of long‑term solution, we’re here to help you make the smartest choices for the roof you have today.

You might also like
RV Roofing Solutions' Blog